Infrared (IR) remote controls are everywhere these days — you’ve probably used them to control your TV, speaker system, air conditioner, fan, or even to switch a light on and off.
But here’s the cool part: you can also use these remotes in your Arduino projects.
In this guide, I’ll show you how to decode signals from an IR remote and then repurpose those signals to control different devices — like turning on LEDs, operating a fan, or even building your own robot car that moves at the press of a button.
Introduction
Remember the dark times, when you had to walk all the way to the TV just to change the channel or lower the volume?
But life’s different now.
You just sit on the couch, press a button, and boom — channel changed, TV off, no need to leave your comfort zone. Lazy? Maybe. Efficient? Absolutely.
Infrared (IR) remote controls are one of the most common ways we interact with electronic devices, including TVs, air conditioners, speakers, fans, and even LED strips. They’re inexpensive, straightforward, and readily available.
But here’s the fun part:
You can use those same remotes in your Arduino projects.
Want to try it yourself?
Here’s a beginner-friendly IR Remote Kit I recommend: IR Remote + Receiver Kit on Amazon
All you need is a small IR receiver and a bit of code, and you’ll be able to read signals from almost any remote — even that old the one you thought was useless.
Once you’ve figured out how the buttons and IR receiver work together, the possibilities are endless depending on your imagination:
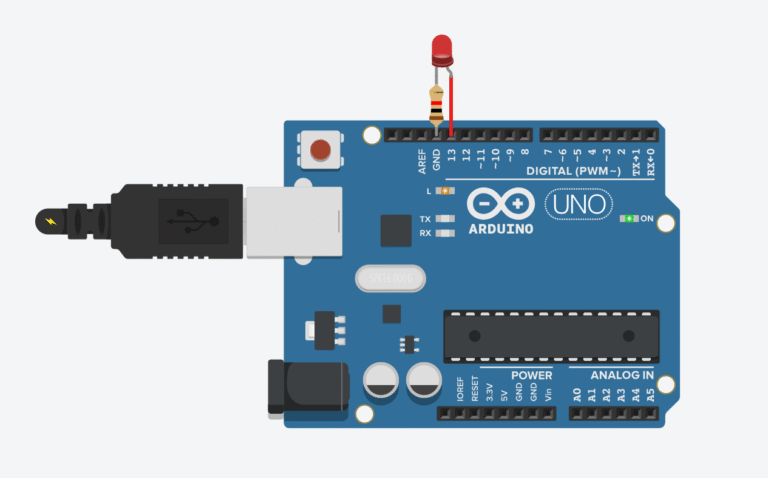
- Turn on an LED with a remote click
- Control a fan, a motor, or even a robot car
- Build your own smart home system
- Or just mess with your friend’s speakers for fun =))
In this guide, we’ll cover:
- How IR remotes work
- How to decode their signals using Arduino
- And how to use those signals to control your own custom stuff
- Let’s turn that boring old remote into something way more fun.
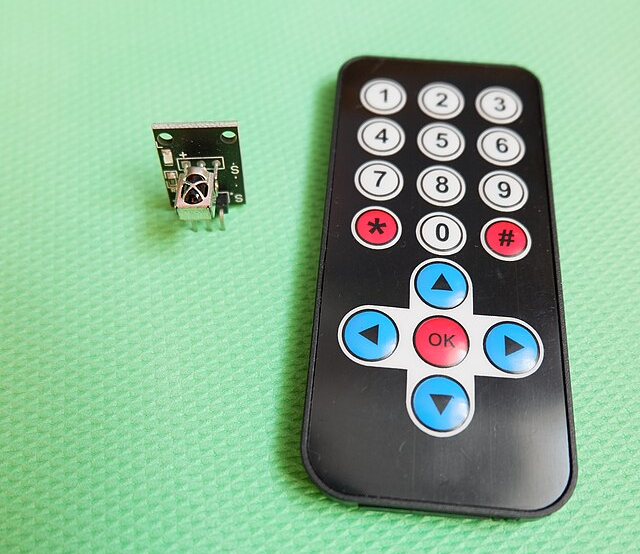
How IR Remote Control works
Before we jump into messing with remote controls, it helps to understand how they actually work.
As the name suggests, IR remotes use infrared light pulses to send signals to devices like TVs or audio systems.
Recommended parts:
Each button on the remote sends out a specific pattern of IR flashes, and the receiver decodes that pattern to trigger the right action — like turning up the volume or switching the channel.
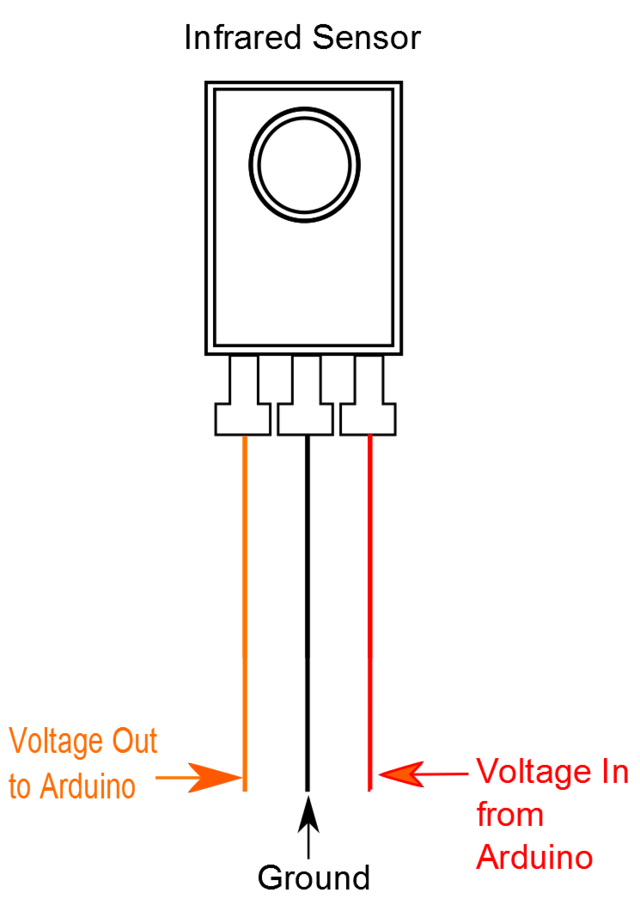
Image credit: Cmcarreras, Wikimedia Commons, CC BY-SA 3.0
These remotes use tiny components called IR LEDs (infrared light-emitting diodes). They’re super cheap and easy to make — in fact, back in the 1970s, IR LEDs were among the first types of LEDs ever made.
Infrared light sits just below the visible spectrum — the name itself literally means “below red”.
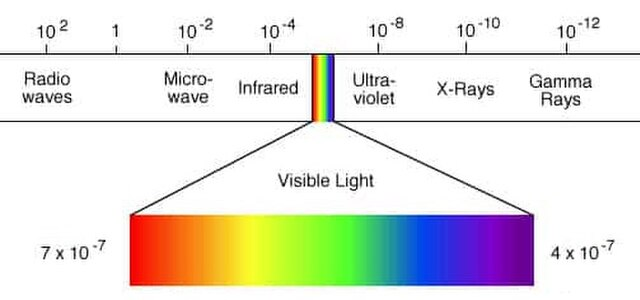
It’s the opposite of ultraviolet (UV) light, which is “above violet”, on the higher end of the light spectrum.
Unlike UV light, which can be harmful when it hits your eyes or skin directly, Infrared light is totally safe to work with so You can look directly at an IR LED on a remote without worrying about your eyes — you won’t even see anything, but it’s there, flashing invisibly.
And believe it or not, you’re exposed to infrared light all the time — from sunlight, heat sources, and even your TV remote. You just don’t notice it.
Working with IR Remote Controls
Working with IR remotes is pretty simple. You’ll need two key components:
- An IR receiver to pick up signals from the remote
- An IR LED (optional) to transmit signals if you want your Arduino to act like a remote
In most beginner projects, we focus on receiving IR signals and using them to control things.
This page includes affiliate links. I may earn a small commission if you purchase through them – at no extra cost to you.
Quick-buy essentials:
IR Receivers
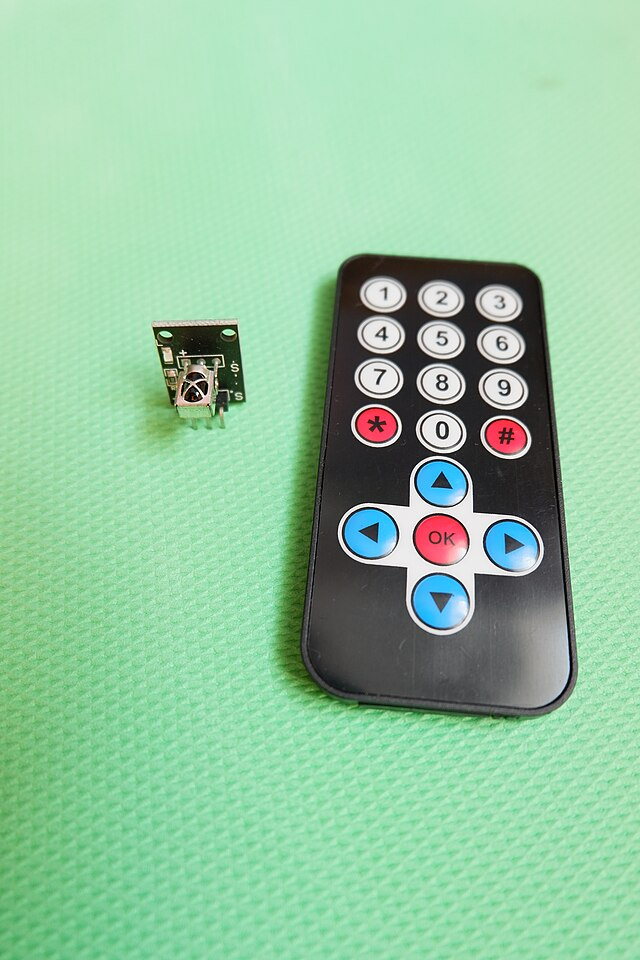
To receive IR signals, you’ll need a dedicated infrared sensor — there are many inexpensive options available online. One of the most popular and beginner-friendly options is the 1838T IR receiver, a tiny 3-pin component commonly found in low-cost IR kits on Amazon, eBay, or AliExpress.
Pinout (IR Receiver Module)
Regardless of the version, the sensor/module usually comes with 3 pins:
- GND – Connects to Arduino GND
- VCC – Connects to 5V on the Arduino
- OUT (Signal) – Sends data pulses to a digital input pin on the Arduino (we’ll use pin 11)
Depending on the module brand, these pins might be labeled differently:
| Label | Meaning |
|---|---|
| G | GND |
| R or V | VCC (5V) |
| S | Signal (Output) |
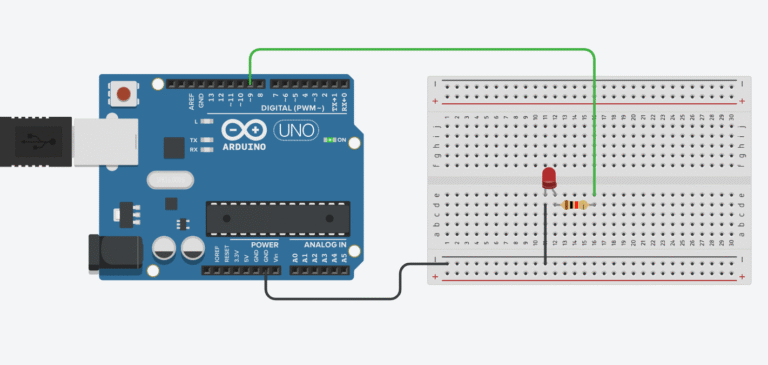
Wiring the IR Receiver to Arduino
Here’s how to wire it:
IR Receiver        Arduino
-----------        -------
GND                GND
VCC                5V
OUT                D11 (or any digital pin)
Make sure the sensor is pointed toward the remote, and not blocked by any object. If you wire it incorrectly, it simply won’t work — you’ll get no signal at all.
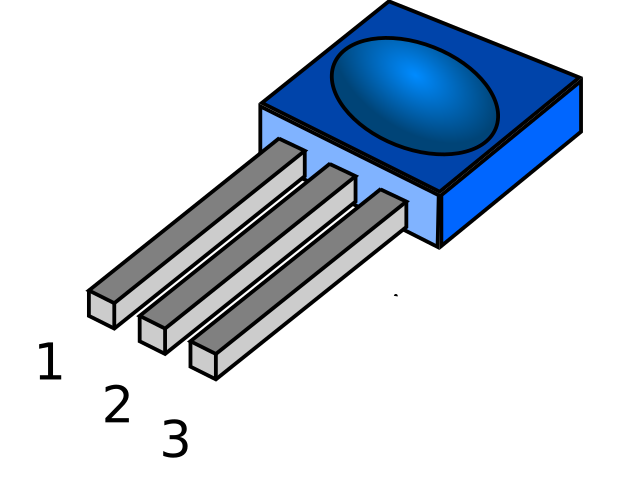
Pinout of the IR Receiver Module
Regardless of version, the IR receiver usually has these 3 pins:
- GND – Connects to ground
- VCC – Connects to 5V (some modules also support 3.3V)
- OUT (Signal) – This pin sends the decoded signal to your Arduino
Depending on the brand, the pins may also be labeled as:
- G, R, S
- Or GND, VCC, SIG
Recommended Gear for This Project
Here’s everything you need to build your own IR-controlled Arduino project:
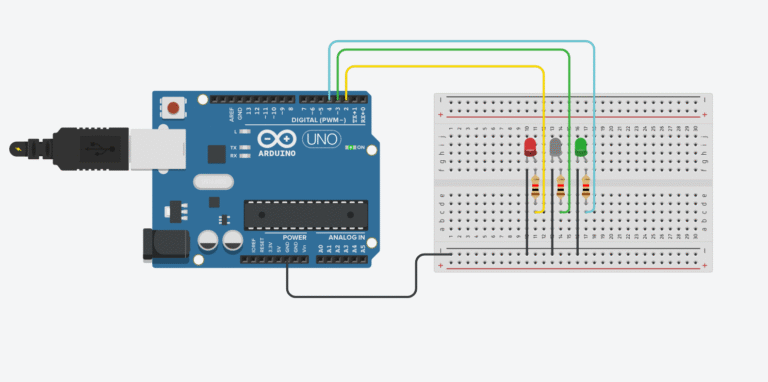
Wiring Example
Here’s how to connect the IR receiver module to your Arduino:
IR Receiver Module → Arduino
----------------------------
GND               → GND
VCC               → 5V
OUT (Signal)      → Digital Pin 11 (you can change this)
If you accidentally reverse the power and ground pins, the sensor just won’t respond. It won’t break — but it’ll act dead. Always double-check your wiring.
Test Code to Read IR Signals
Install the IRremote library in your Arduino IDE first. You can find it via Library Manager (Tools > Manage Libraries) and search for “IRremote by shirriff”.
Then upload this basic test sketch:
#include <IRremote.h>

const int RECV_PIN = 11;
IRrecv irrecv(RECV_PIN);
decode_results results;

void setup()
{
  Serial.begin(9600);
  irrecv.enableIRIn(); // Start the receiver
}

void loop()
{
  if (irrecv.decode(&results))
  {
    Serial.print("Received HEX: ");
    Serial.println(results.value, HEX);
    irrecv.resume(); // Receive the next value
  }
}
Once uploaded, open your Serial Monitor and press buttons on your IR remote. You’ll see lines like this:
Received HEX: FF6897
Received HEX: FF9867
Received HEX: FFA857
What Are These HEX Codes?
Every button on your IR remote sends a unique hexadecimal (HEX) code. It’s just a way for the Arduino to identify which button was pressed.
For example:
- Button “1” might send:
0xFF30CF - Button “2” might send:
0xFF18E7 - Power button might send:
0xFFA25D
These values will vary depending on your remote, so the first thing you need to do is record the codes for each button you want to use.
You can then use those HEX values in your sketch to trigger different actions. Example:
if (results.value == 0xFFA25D) {
  // Do something when Power button is pressed
}
💡 Tip: Write down the HEX codes from your Serial Monitor and label them based on the button names. It’ll make your coding much easier later on.
🔧 Recommended Arduino Starter Kits for Beginners
If you’re just getting started with Arduino, these beginner-friendly kits will help you learn faster and avoid the headache of missing parts. They all include essential components like LEDs, resistors, jumper wires, and an Arduino-compatible board.
- Arduino Official Starter Kit
Includes a genuine Arduino UNO board, project book, and components for 15+ tutorials.
👉 Check it on Amazon - Elegoo UNO R3 Super Starter Kit
Affordable and packed with sensors, LEDs, motors, and wires — great value.
👉 View the Elegoo Kit - Freenove Ultimate Starter Kit
Includes 200+ components, an Arduino-compatible board, and 50+ example projects.
👉 See the Freenove Kit
💡 Tip: Choose a kit with a good variety of components so you can build multiple projects without buying extra parts later.