Physical Address
304 North Cardinal St.
Dorchester Center, MA 02124
Physical Address
304 North Cardinal St.
Dorchester Center, MA 02124

So you’ve mastered the basic LED blink using delay(). Feels good, right? But here’s the thing: delay() is kind of a beginner trap. It stops everything while it waits — like freezing your whole code just to blink a light.
What if you want to blink an LED and read a button? Or update a sensor at the same time? That’s where millis() comes in — and where you level up.
This is the classic “Blink Without Delay” sketch. Let’s break it down.
This post may contain affiliate links. If you purchase through these links, I may earn a small commission at no extra cost to you. It helps support this blog and keeps the projects coming—thanks for your support!
delay()?When you use delay(1000);, your entire program does nothing for 1 second. Literally nothing. Can’t read buttons. Can’t talk to sensors. Just vibes.
If you want non-blocking code — code that keeps doing things in the background — you need a smarter way.
millis()millis() is a built-in function that returns the number of milliseconds since your Arduino started running.
Think of it like a stopwatch. Instead of pausing with delay(), you check the time and act when enough time has passed.
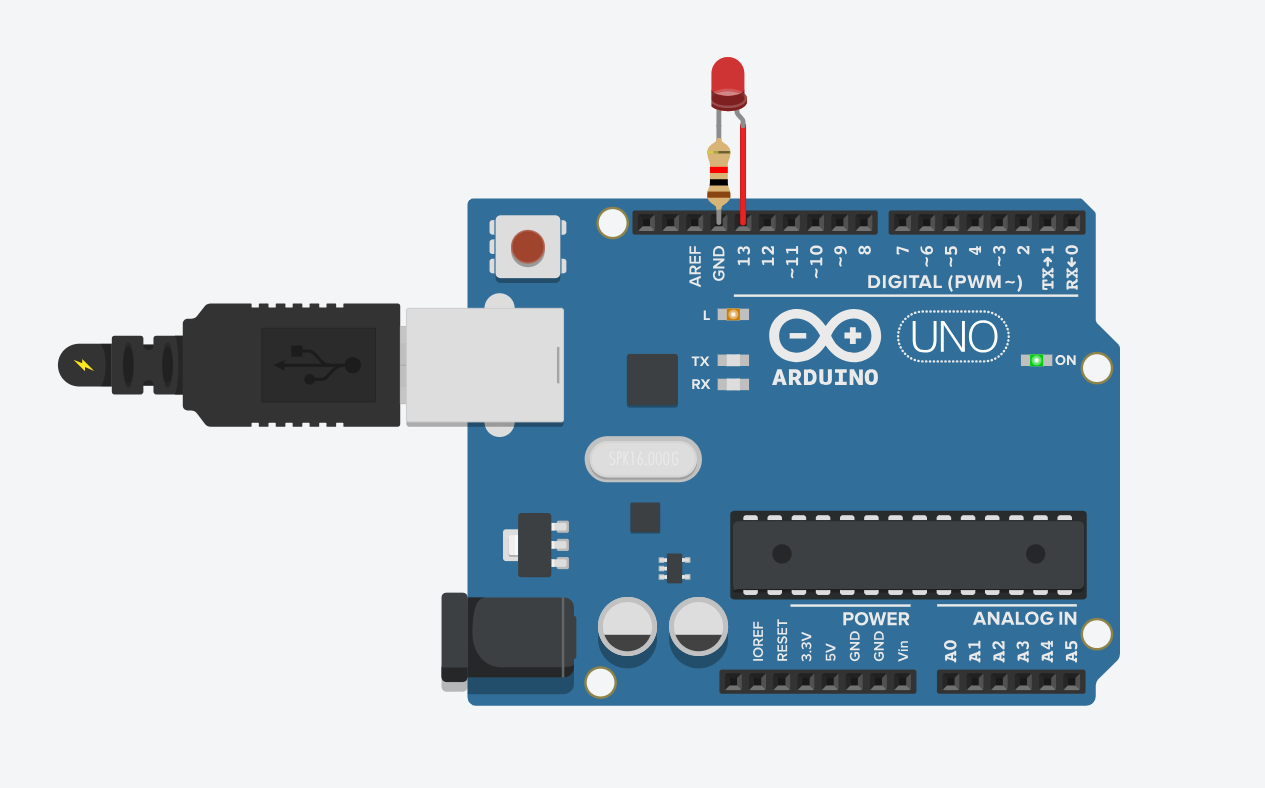
const int ledPin = 13;         // LED connected to digital pin 13
unsigned long previousMillis = 0;  // stores last time LED was updated
const long interval = 1000;        // interval at which to blink (ms)

void setup() {
  pinMode(ledPin, OUTPUT);
}

void loop() {
  unsigned long currentMillis = millis();

  if (currentMillis - previousMillis >= interval) {
    previousMillis = currentMillis;

    // if the LED is off turn it on and vice-versa:
    digitalWrite(ledPin, !digitalRead(ledPin));
  }
}
millis() gives us the current timepreviousMillis (the last time we blinked)interval), we toggle the LEDdelay() — so the rest of your code keeps runningdigitalWrite(ledPin, !digitalRead(ledPin)); just flips the LED state. You can also use a separate variable if you prefer.
This isn’t just blinking smarter — it’s how you write real programs:
delay()If delay() is training wheels, then millis() is when you start popping wheelies.

Want to blink two LEDs at different speeds? You can do it easily with millis():
// LED 1 - blinks every 500ms
// LED 2 - blinks every 1000ms

const int led1 = 9;
const int led2 = 10;
unsigned long prev1 = 0;
unsigned long prev2 = 0;
const long int1 = 500;
const long int2 = 1000;

void setup() {
  pinMode(led1, OUTPUT);
  pinMode(led2, OUTPUT);
}

void loop() {
  unsigned long now = millis();

  if (now - prev1 >= int1) {
    prev1 = now;
    digitalWrite(led1, !digitalRead(led1));
  }

  if (now - prev2 >= int2) {
    prev2 = now;
    digitalWrite(led2, !digitalRead(led2));
  }
}
Boom. Two LEDs, different speeds, zero delays.
“Blink Without Delay” isn’t just a fancy way to blink LEDs — it’s the foundation of multitasking with Arduino.
Learn it well and you’ll unlock a whole new level: from juggling inputs and outputs, to running real-time systems and making responsive projects.
Time to ditch the delay — and code like a boss
If you’re just getting started with Arduino, these beginner-friendly kits will help you learn faster and avoid the headache of missing parts. They all include essential components like LEDs, resistors, jumper wires, and an Arduino-compatible board.
💡 Tip: Choose a kit with a good variety of components so you can build multiple projects without buying extra parts later.