Physical Address
304 North Cardinal St.
Dorchester Center, MA 02124
Physical Address
304 North Cardinal St.
Dorchester Center, MA 02124

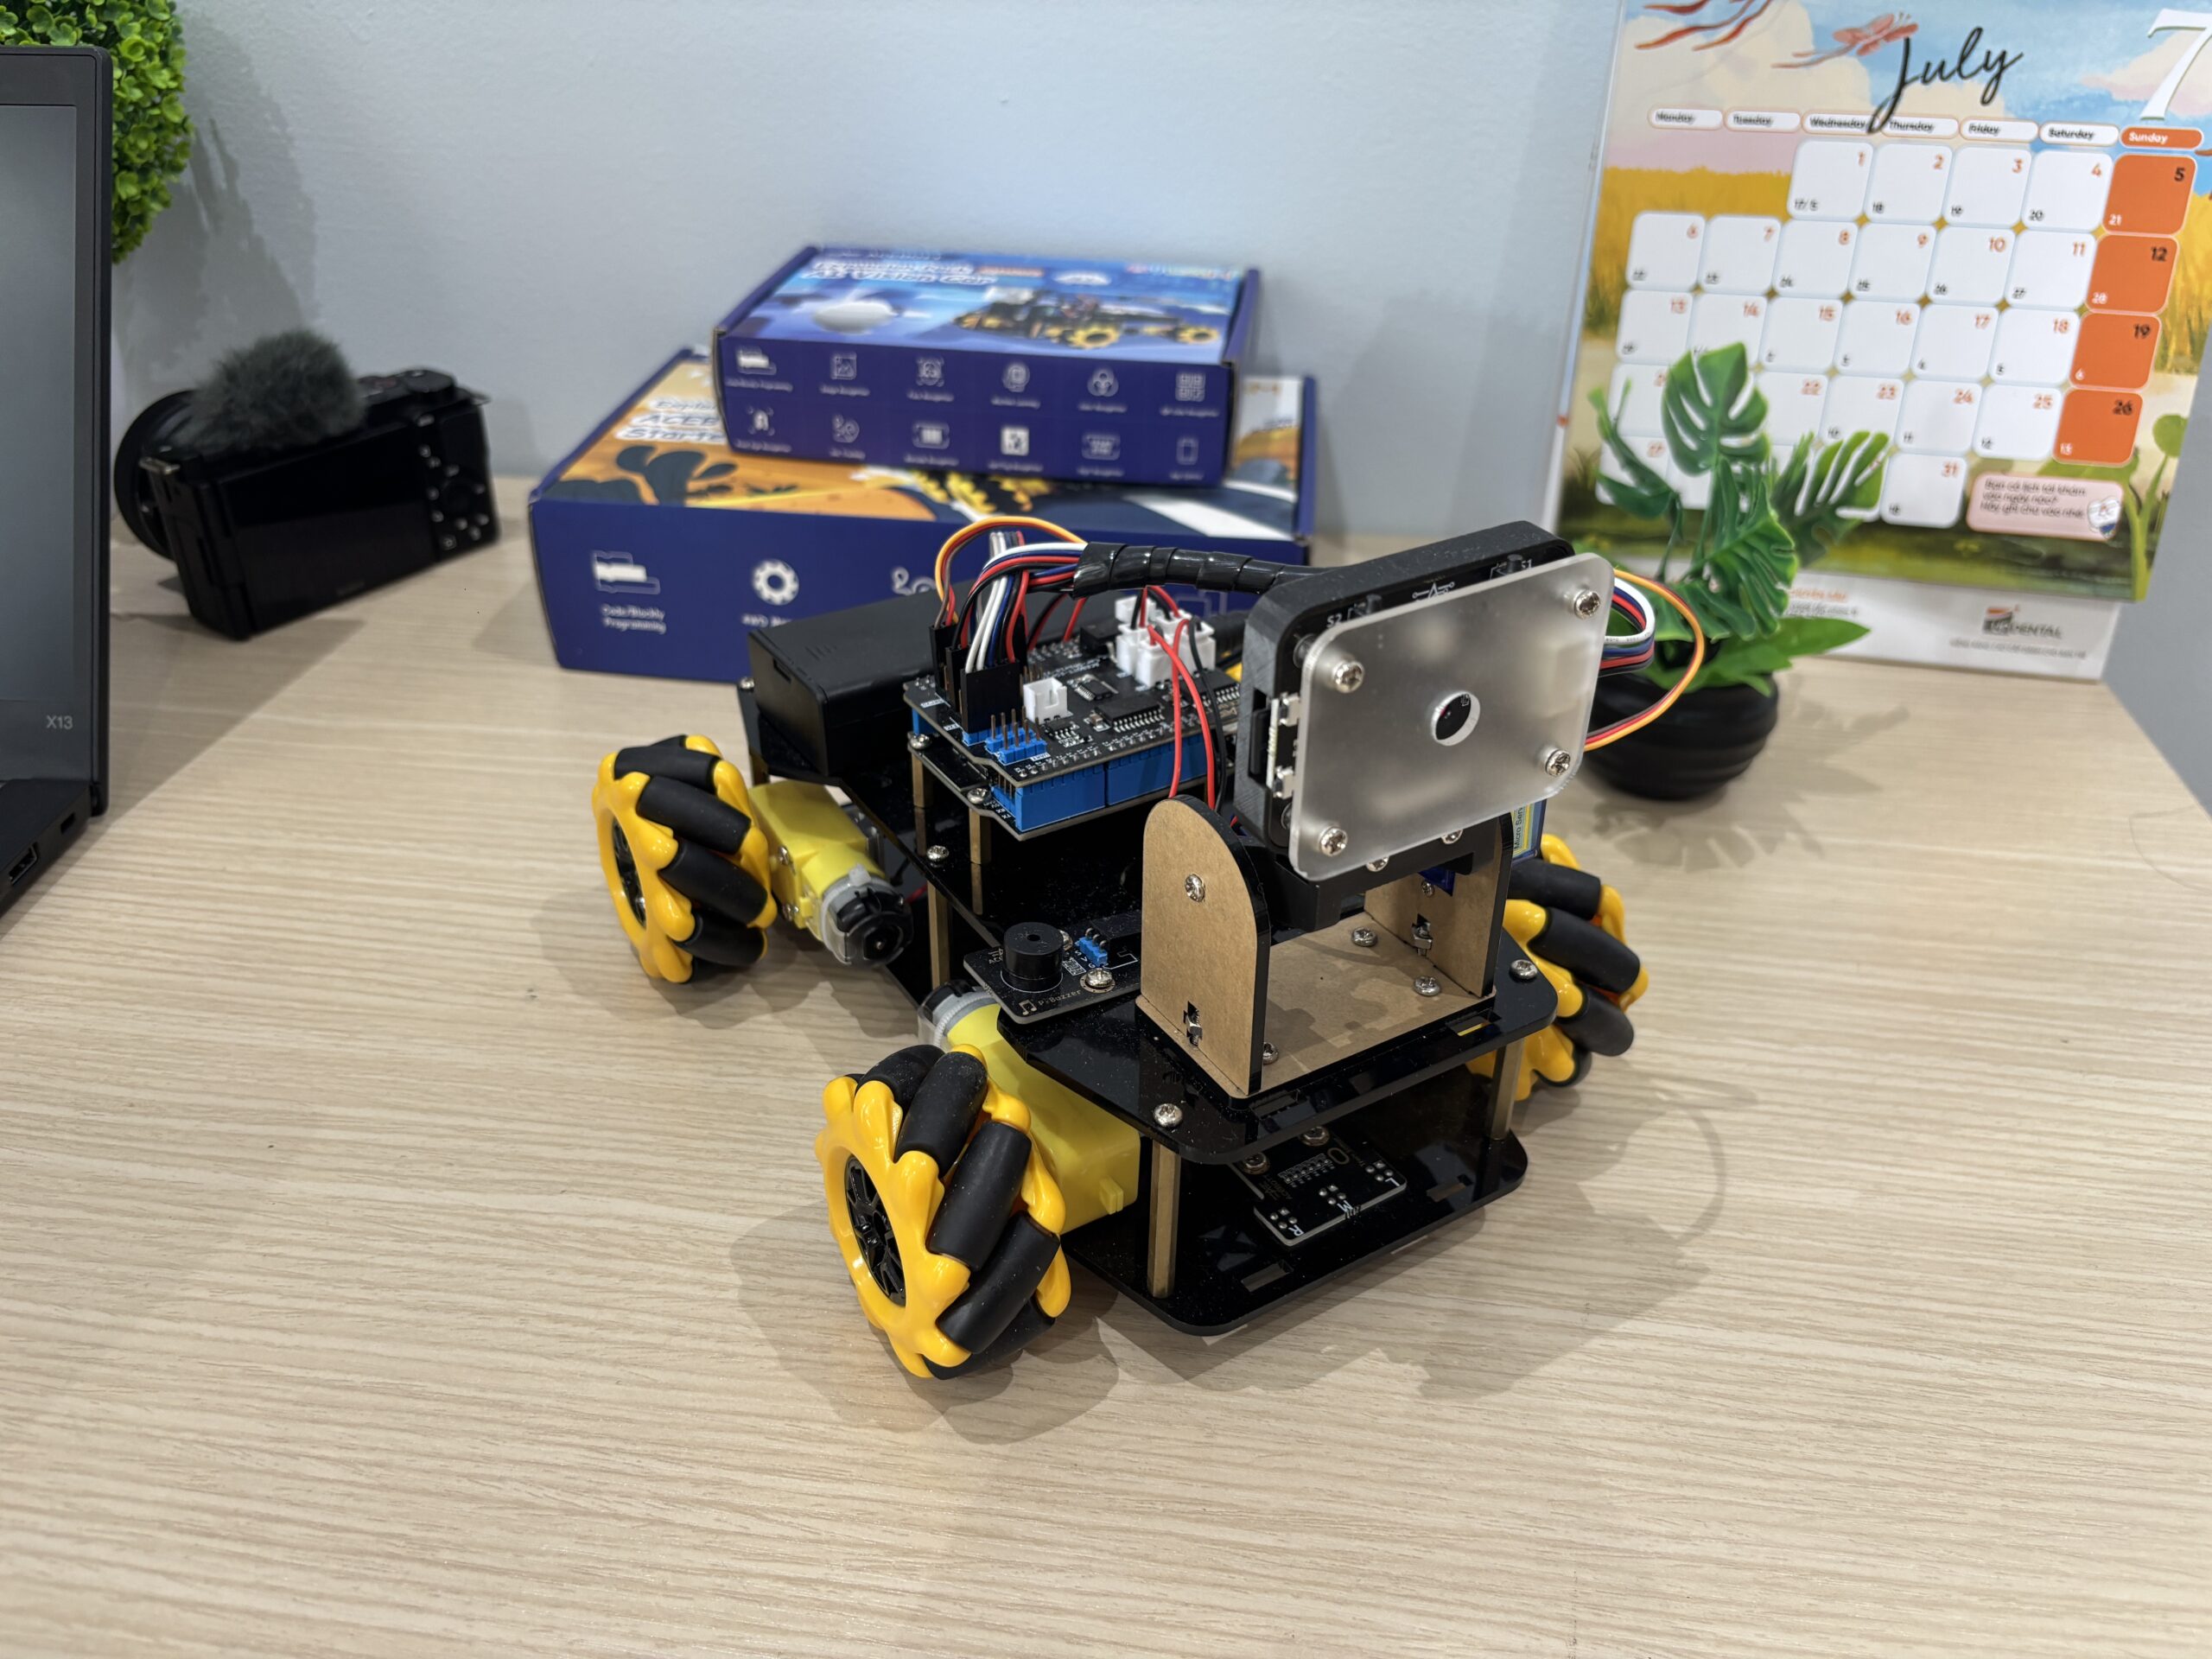
Artificial Intelligence and robotics are no longer technologies reserved for research laboratories or large companies. Today, educational robot kits make it possible for students, hobbyists, and makers to learn programming, electronics, mechanical design, and computer vision from home. One of the most interesting platforms currently available is the ACEBOTT QD001 Smart Robot Car, especially when paired with the QD003 AI Vision Expansion Kit.
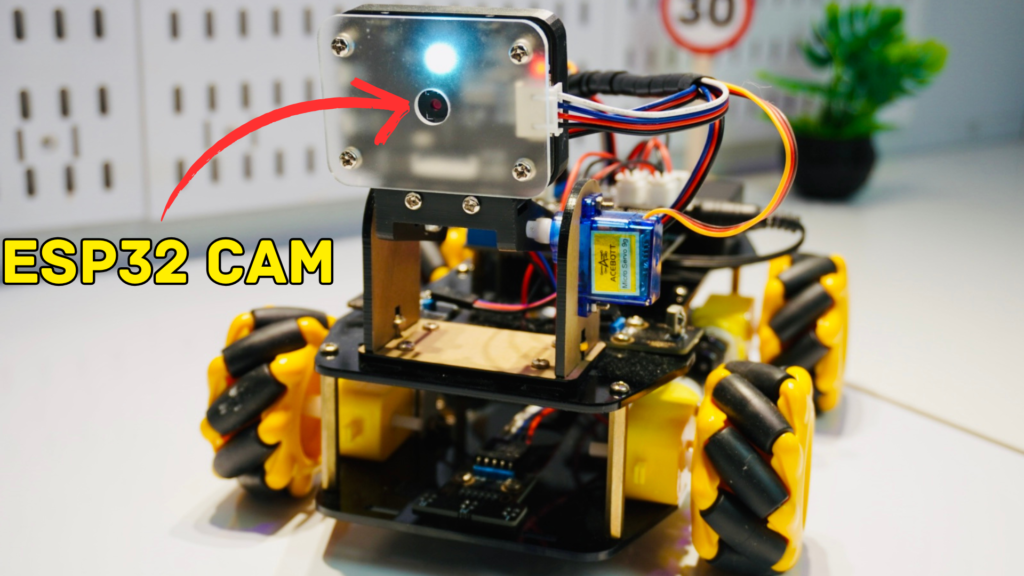
Unlike many beginner robot kits that focus on only one feature—such as line tracking or obstacle avoidance—the QD001 provides a complete robotics platform with omnidirectional movement, while the QD003 introduces real-time AI vision using a Kendryte K210 processor. Together, they create a compact robot capable of recognizing traffic signs, colors, barcodes, QR codes, numbers, faces, and even following a line using computer vision instead of traditional infrared sensors.
In this article, I’ll walk through the entire experience—from opening the box and assembling every component to programming the robot and testing each feature individually. If you’re considering this kit for learning robotics or STEM education, this review will show exactly what to expect.
Opening the package immediately gives the impression of a well-organized educational product. Each electronic module is packed separately, and the screws are grouped by size, making the assembly process much less confusing.
The QD001 kit includes:
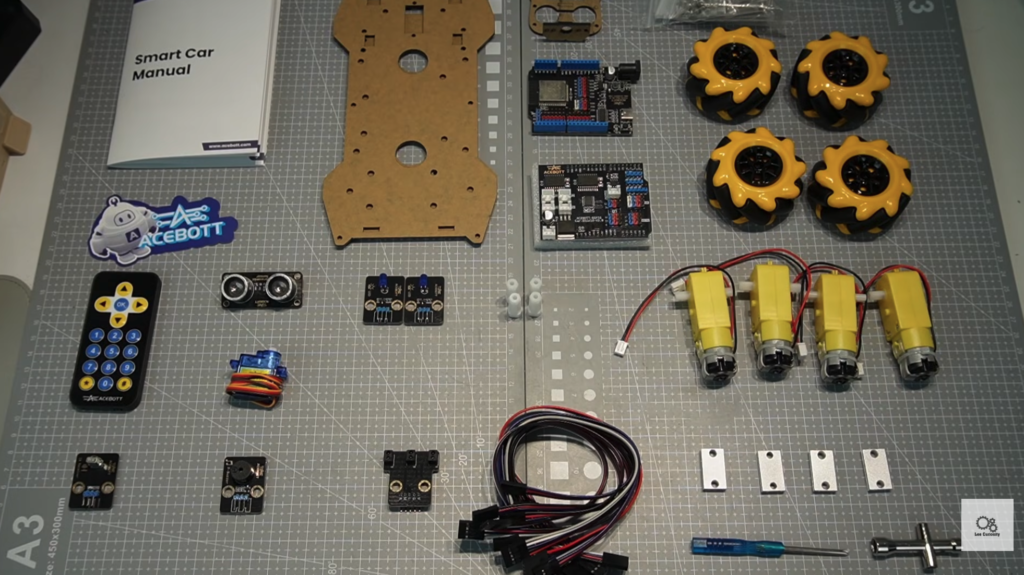
You can check the full unboxing and setup here :
The QD003 expansion kit includes:
At first glance, there are many small components, but everything is clearly labeled, making it suitable even for beginners with little assembly experience.
Assembly begins with the aluminum chassis.
Unlike plastic robot kits, the aluminum frame feels rigid and gives the robot a premium appearance. The chassis already contains precisely machined mounting holes, so every component aligns correctly without modification.
The first task is installing the four DC geared motors.
Although this seems straightforward, this is actually one of the most important steps because the robot uses Mecanum wheels.
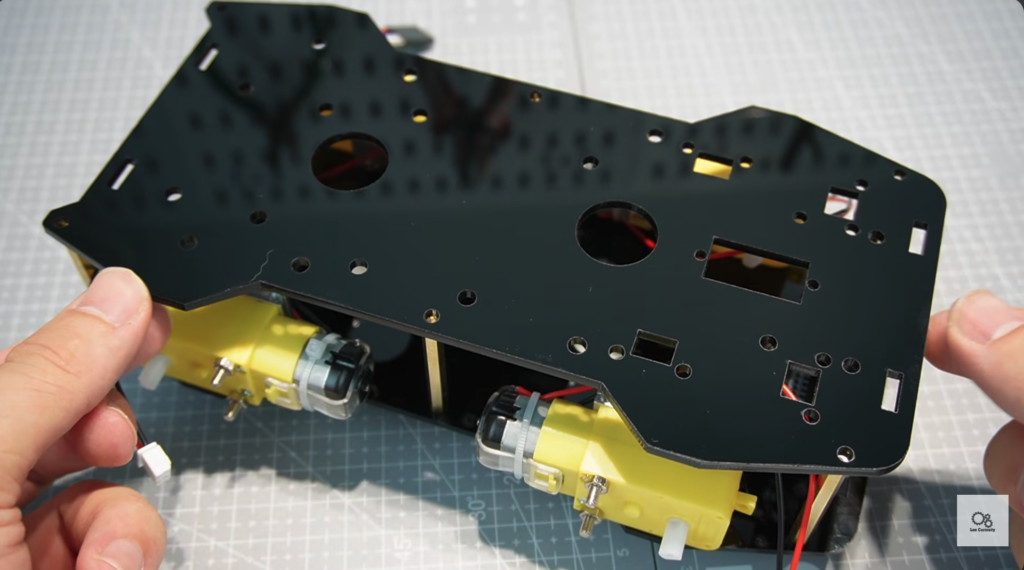
Each wheel contains rollers mounted at a 45-degree angle. These rollers allow the robot to move not only forward and backward but also sideways and diagonally.
However, this only works when every wheel is installed in the correct orientation.
During assembly, I double-checked every wheel before tightening the screws. Installing even one wheel incorrectly would prevent the robot from moving sideways correctly and would cause strange drifting during diagonal movement.
Once all four motors and wheels were installed, the robot already felt extremely solid.
With the mechanical frame complete, the next stage was installing the electronics.
The ESP32-Car Shield V2.0 sits on top of the chassis and acts as the central hub connecting every sensor and motor to the ESP32 controller.
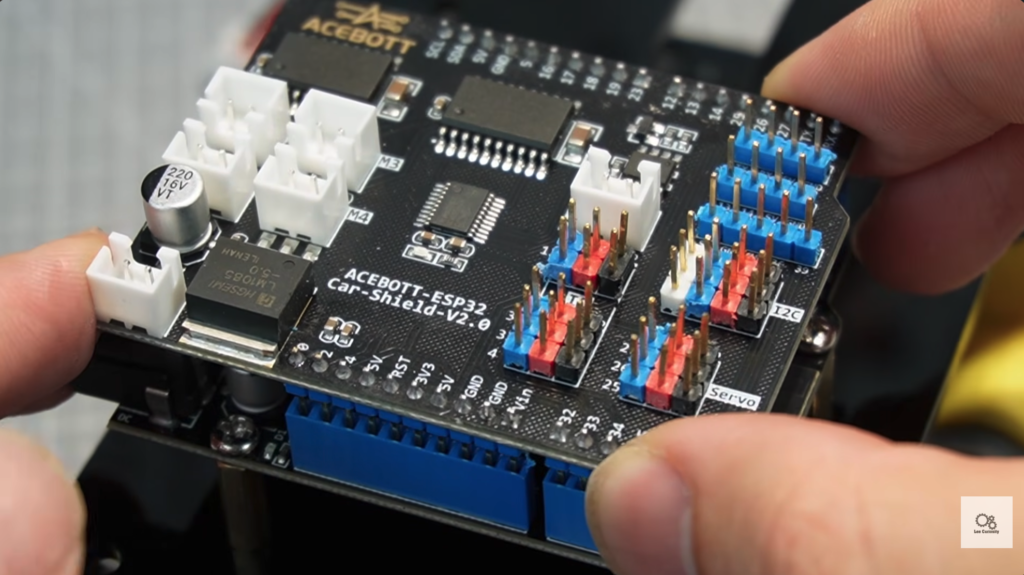
One thing I really appreciated during the assembly process was that nearly every connector is keyed, making it difficult to plug a cable into the wrong port. In addition, all of the sensor cables use color-coded wires, which makes identifying each connection much easier. For example, the red wire indicates the 5V power supply, the black wire represents GND (ground), and the remaining wires are used for signaling or communication. This thoughtful design allows beginners to verify their wiring at a glance, reducing the chance of connection mistakes and making the entire assembly process much more straightforward.
This means beginners don’t need to worry too much about plugging cables in backwards.
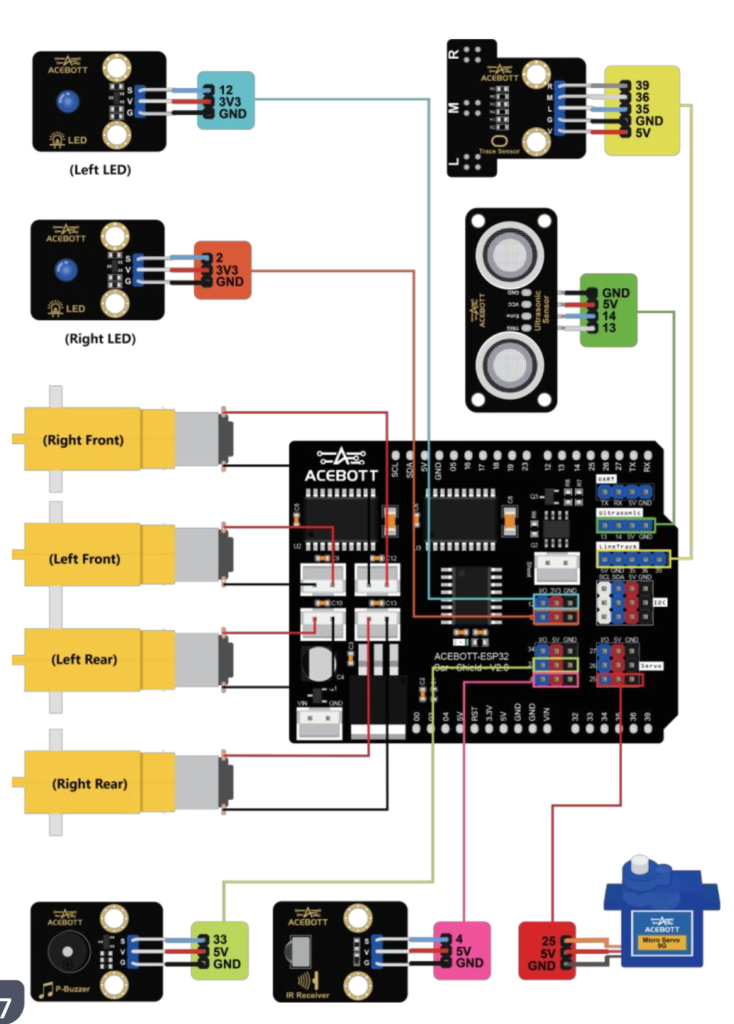
After mounting the controller, I connected:
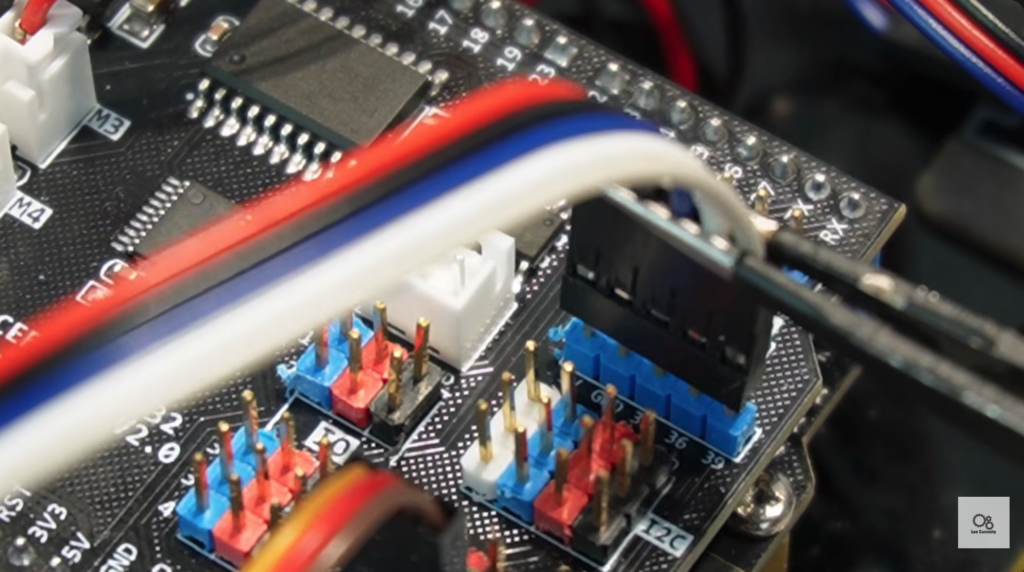
Cable management is surprisingly important. Make sure you connect all the sensors to the right terminal as indicated in the manual.
Since the robot rotates in every direction, loose wires can easily become tangled with the wheels. Taking an extra few minutes to route and secure the cables results in a much cleaner and more reliable build.
After installing all of the electronic components, it’s time to power up the robot and test it using your smartphone. Before writing any code, you can verify that the motors, battery, and Bluetooth communication are working correctly by connecting the robot to the ACEBOTT mobile app. This allows you to manually control the robot’s movement and confirm that everything has been assembled properly before moving on to more advanced programming and AI vision features.
In addition to Wi-Fi programming, ACEBOTT also provides a dedicated mobile app that allows you to control the robot directly over Bluetooth. The app is available for both iOS (App Store) and Android (Google Play), making it easy to get started regardless of your device.
Pairing the robot with the app only takes a few moments. Once connected, you can drive the robot using an on-screen joystick, control its movement in all directions, and interact with various built-in functions without writing any code. During testing, the Bluetooth connection was stable with very low latency, and the robot responded almost instantly to control inputs.
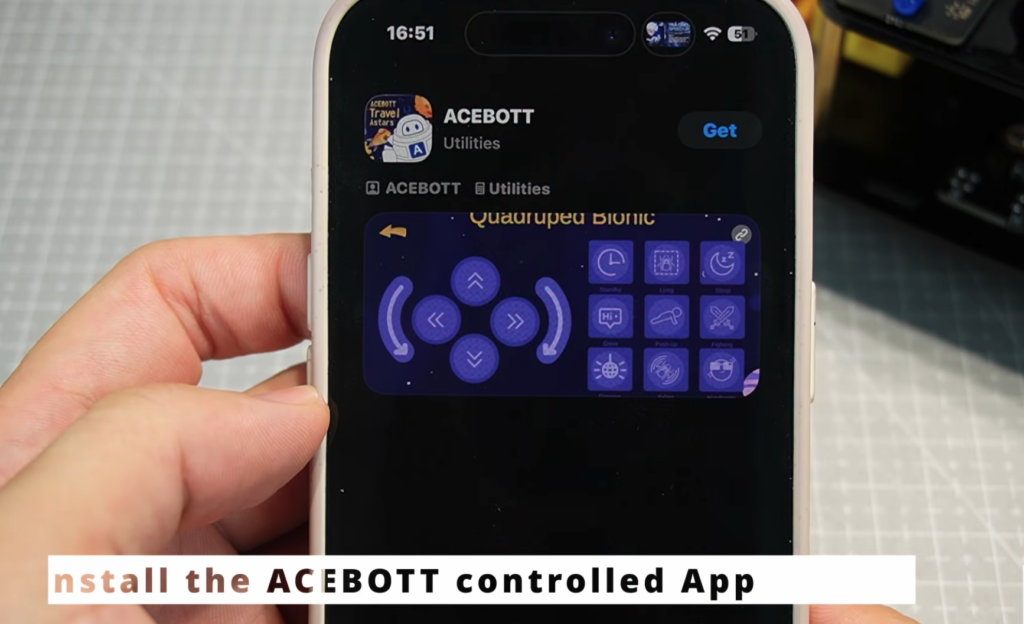
This feature is especially useful for beginners, allowing them to enjoy driving the robot immediately after assembly before moving on to more advanced programming projects. It’s also great for classroom demonstrations, where students can quickly connect their phones and experience the robot’s omnidirectional movement without needing a computer.
After completing assembly, I tested every available function one by one.
This was the very first test because it verifies both the mechanical assembly and motor wiring.
The robot successfully performed:
Watching the robot slide sideways without turning is surprisingly satisfying.
The movement is smooth because the Mecanum wheels distribute force across all four motors simultaneously.
After approximately twenty minutes of driving, none of the motors became noticeably warm.
The next experiment involved obstacle avoidance.
Rather than simply stopping when an object appears, the robot rotates the ultrasonic sensor from left to right.
It measures both directions before selecting the path with more available space.
Testing involved placing books, boxes, and bottles in front of the robot.
Results were consistent.
Objects larger than roughly 10 cm were detected reliably.
The scanning behavior makes the robot appear far more intelligent than robots using fixed ultrasonic sensors.
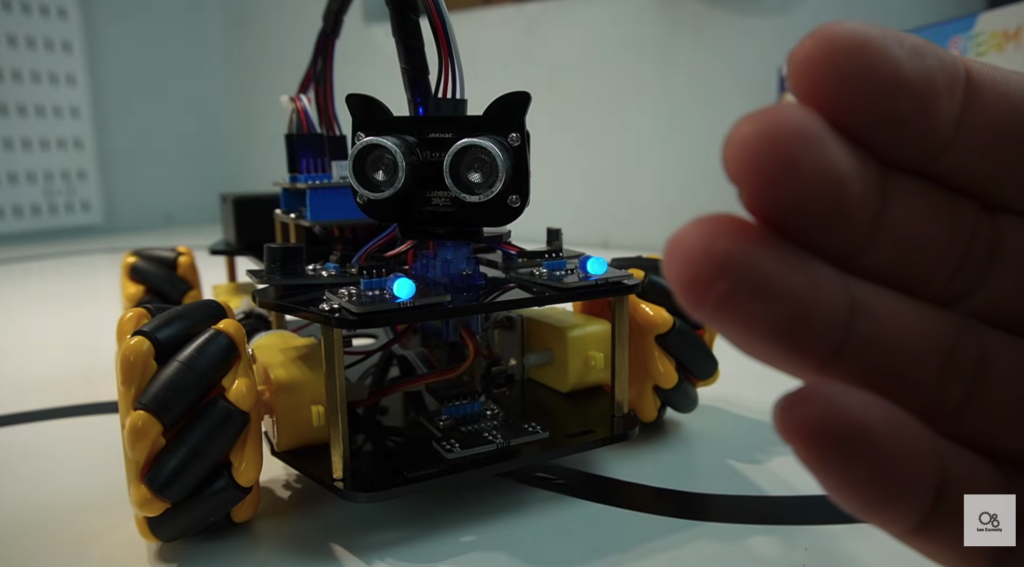
Traditional line following uses infrared sensors underneath the chassis.
The ACEBOTT implementation performed well on white paper with black electrical tape.
Initially, I observed some small oscillations during sharp curves.
Reducing the robot’s speed slightly produced much smoother tracking.
This project is excellent for demonstrating how simple optical sensors detect differences in reflected infrared light.
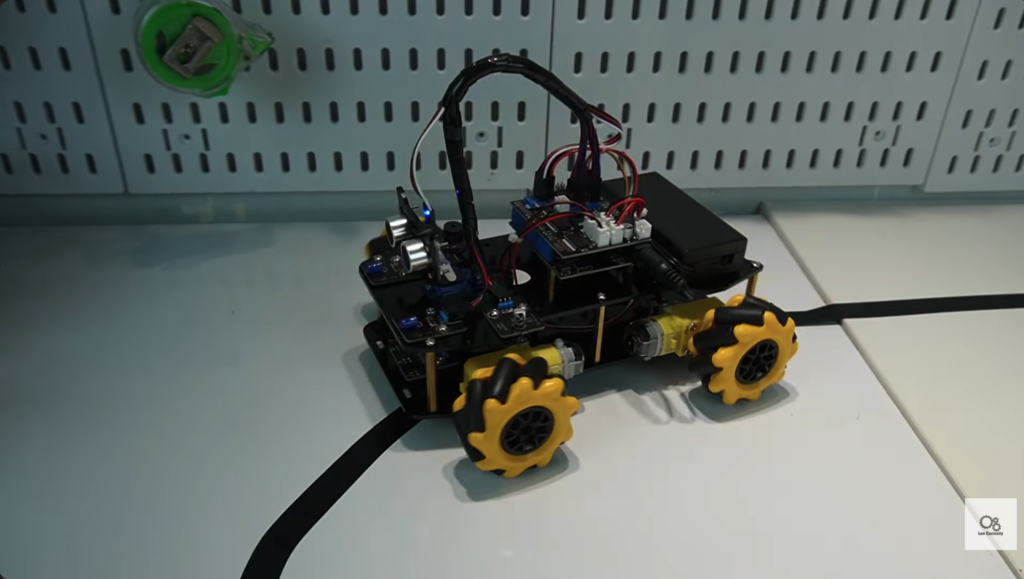
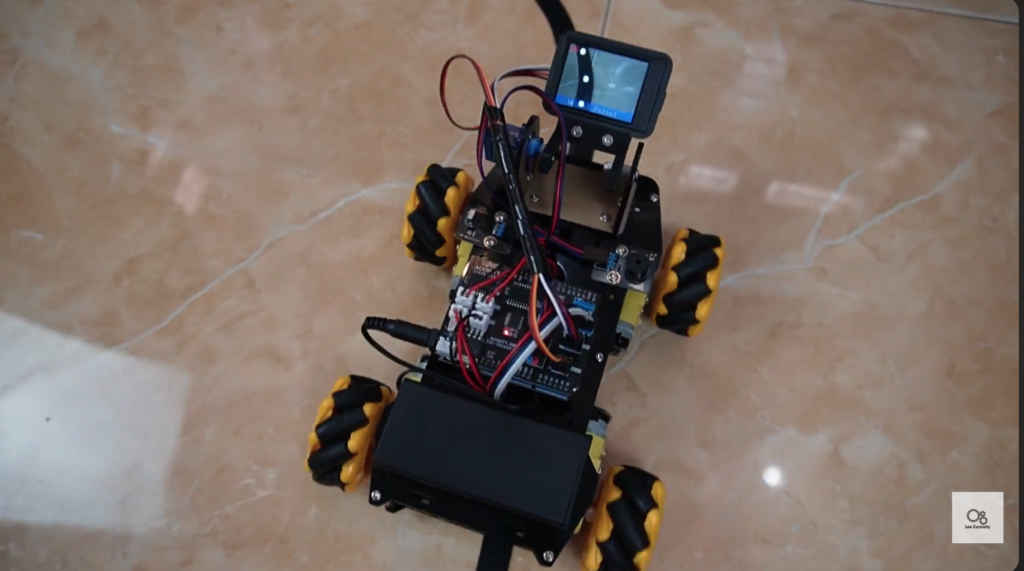
While the QD001 is an excellent robotics platform on its own, the QD003 AI Vision Expansion Kit is what transforms it into a truly intelligent robot. Instead of relying solely on traditional sensors such as ultrasonic or infrared modules, the QD003 enables the robot to “see” and interpret its surroundings using artificial intelligence.
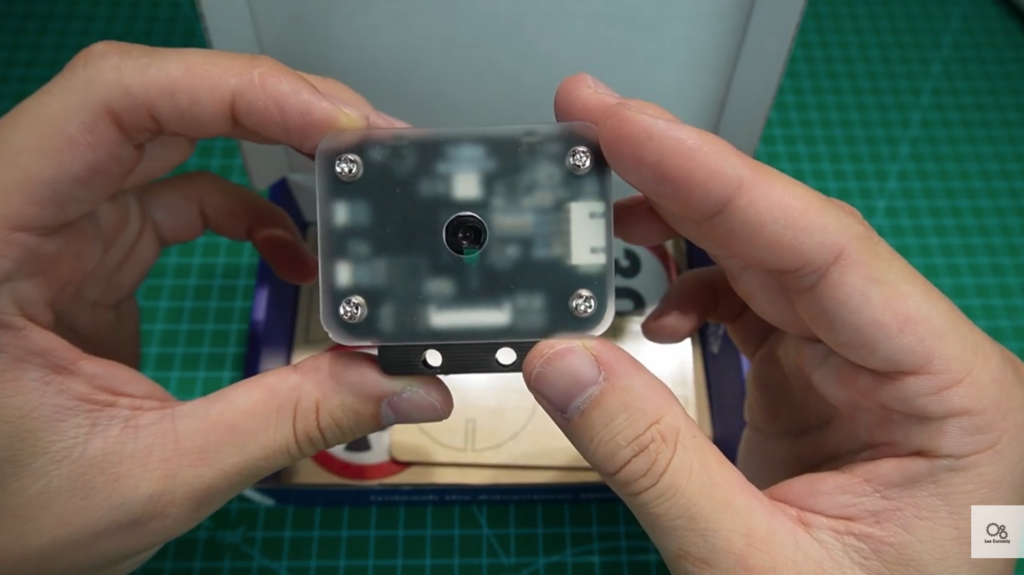
At the heart of the expansion kit is a Kendryte K210 AI vision module, a dual-core RISC-V processor with a built-in neural network accelerator designed specifically for edge AI applications. Unlike cloud-based AI systems, all image processing is performed directly on the camera module itself. This means the robot can recognize objects and make decisions in real time without requiring an internet connection or a powerful external computer.
The kit includes everything needed to upgrade the QD001 robot:
Installation is straightforward. The camera is mounted on the front of the robot using the supplied bracket, providing a clear, forward-facing view. After connecting the communication cable to the ESP32 controller, the hardware setup is complete.
One of the biggest advantages of this design is the division of processing tasks. The K210 module handles all image acquisition and AI inference, including object detection and image recognition, while the ESP32 remains responsible for motor control, sensor management, and executing movement commands. This separation allows the robot to perform complex vision tasks without overloading the main controller, resulting in smoother operation and faster response times.
What makes the QD003 especially impressive is the wide range of built-in AI applications. Using the provided firmware, the camera can recognize traffic signs, detect different colors, decode barcodes and QR codes, identify printed numbers, detect human faces, recognize predefined objects, and even perform AI-based line following using only the camera image instead of infrared sensors. These capabilities allow users to explore many real-world robotics concepts without needing to train their own machine learning models from scratch.
For beginners, the QD003 provides an easy introduction to embedded artificial intelligence. For more advanced users, it serves as a powerful platform for experimenting with computer vision, autonomous navigation, and human-robot interaction. Combined with the omnidirectional movement of the QD001, the AI vision module turns the robot into a compact yet capable educational platform that bridges the gap between traditional robotics and modern AI-powered systems.
Now we arrive at the most exciting part of this review.
The QD003 transforms the robot from a simple educational vehicle into a genuine AI vision platform.
You can check the video on how to assemble the QD003 to QD001 robot kit :
I first tested traffic sign recognition using printed road signs.
The robot recognized:
Recognition typically occurred within a fraction of a second after the sign entered the camera’s field of view.
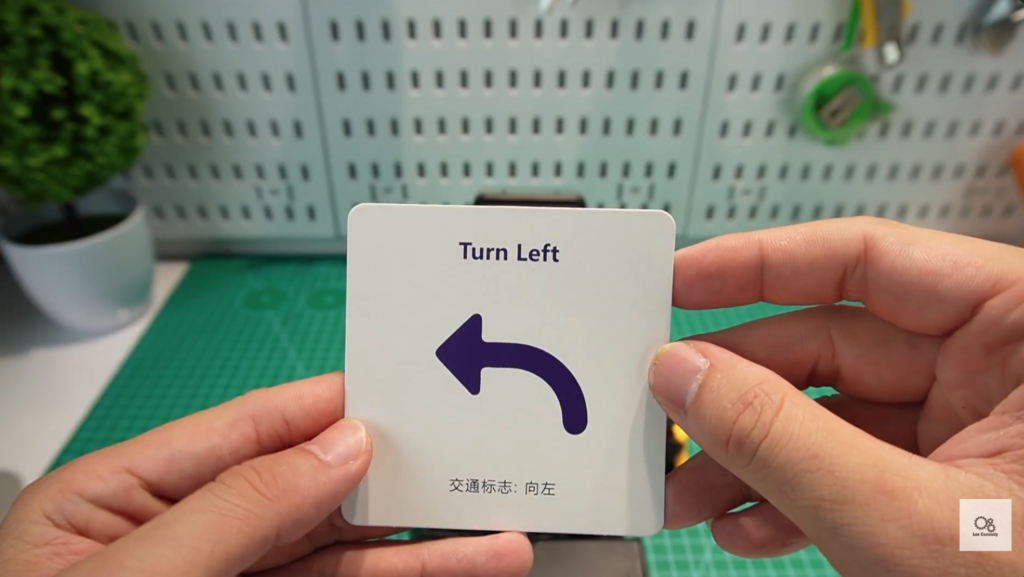
The corresponding movement was executed immediately.
Watching the robot react automatically to traffic signs feels remarkably similar to a miniature autonomous vehicle.
Next, I prepared several colored cards.
The camera successfully distinguished:
Lighting conditions play an important role.
Under bright indoor lighting, detection was nearly perfect.
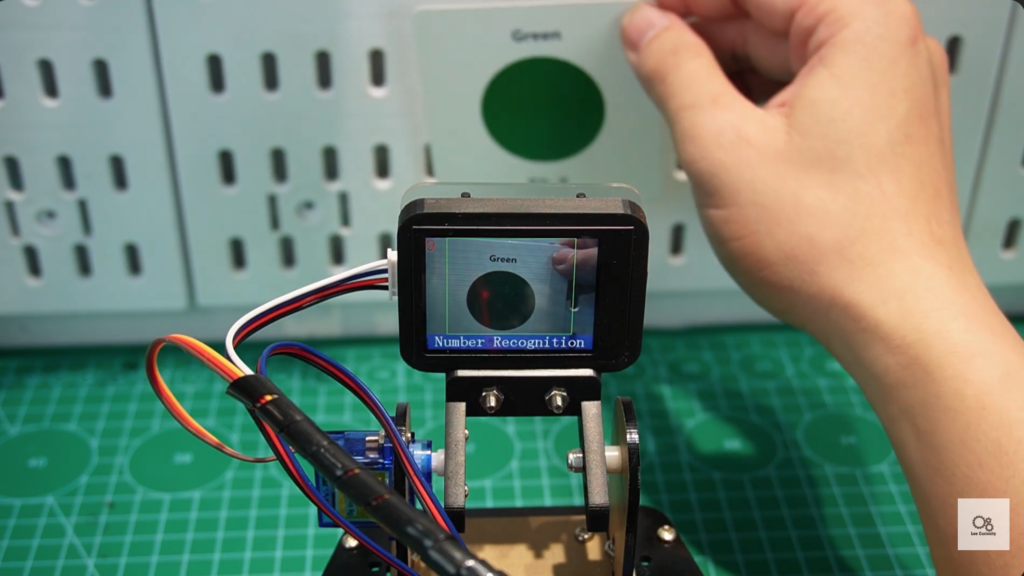
Under dim lighting, recognition occasionally became slower, although the correct color was still identified most of the time.
This demonstrates one of the most important lessons in computer vision: image quality directly affects recognition performance.
Industrial factories use barcode readers extensively.
The QD003 demonstrates the same concept using its built-in AI camera.
Testing several product labels showed that the robot decoded barcodes quickly and accurately.
The recognition distance depended on barcode size, but standard retail barcodes were read without difficulty.
This makes the kit particularly interesting for students interested in warehouse automation or industrial robotics.
QR code recognition was equally impressive.
I generated several QR codes containing website links and plain text.
The robot decoded each code almost instantly.
Unlike barcodes, QR codes store significantly more information, making this feature useful for interactive classroom projects and smart logistics demonstrations.
The camera was also able to recognize printed digits.
Single-digit recognition was extremely reliable.
Even when numbers were rotated slightly, the recognition remained accurate.
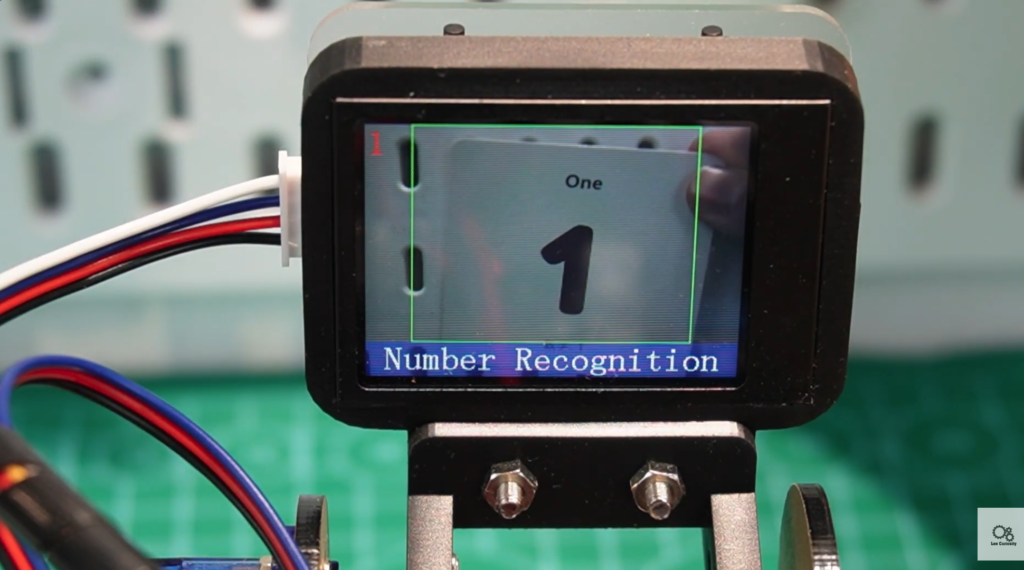
Students can easily expand this into projects such as automatic scoreboard reading or simple license plate experiments.
Face detection was one of my favorite demonstrations.
The camera immediately detected human faces and displayed the recognition result.
Although this is not intended as high-security facial authentication, it provides an excellent introduction to AI object detection.
For STEM education, this feature effectively demonstrates how embedded AI systems identify human faces in real time.
The camera also supports image classification.
Objects trained within the supported model can be recognized consistently.
This allows students to explore custom AI applications without needing expensive GPUs or cloud computing.
Perhaps the most fascinating feature is AI line following.
Instead of relying on infrared sensors mounted underneath the chassis, the robot follows the track entirely using the camera.
This approach resembles modern autonomous vehicles much more closely.
Although the robot moves slightly slower than traditional infrared line following, the demonstration provides valuable insight into computer vision navigation techniques used in real robotics research.
The ACEBOTT QD001 and QD003 are far more than a simple programmable toy. Together they form a complete educational robotics platform that introduces users to nearly every major area of modern robotics, including mechanical assembly, embedded programming, wireless control, autonomous navigation, sensor fusion, and Edge AI.
The assembly process is enjoyable without being overwhelming, making it suitable for beginners while still providing enough complexity to teach valuable engineering skills. Once assembled, the robot performs impressively across all of its demonstrations, from smooth omnidirectional driving and reliable obstacle avoidance to accurate traffic sign recognition, barcode scanning, face detection, and AI-powered line following.
What impressed me most is how naturally the learning progressed. You begin by understanding motors and chassis construction, then move on to sensors, wireless communication, and finally explore artificial intelligence through real-time computer vision. Instead of purchasing separate kits for each topic, the QD001 and QD003 combine them into a single expandable platform that grows with your skills.
If you’re looking for a robot kit that teaches not only how to build a robot but also how modern intelligent robots perceive and interact with the world, the ACEBOTT QD001 with the QD003 AI Vision Expansion is one of the most comprehensive STEM platforms currently available.