

Table of Contents
1. Introduction
If you’re diving into electronics or gearing up for your first DIY Arduino project, soldering is a skill you’ll inevitably need. But it’s more than just heating up metal. Trust me, having the right tools makes the process smoother, safer, and far less frustrating (coming from someone who initially attempted soldering on a kitchen table—definitely not recommended).
Here’s a detailed breakdown of the essential soldering tools and materials every beginner should have—no unnecessary fluff, just reliable and practical advice.
2. The Soldering Iron
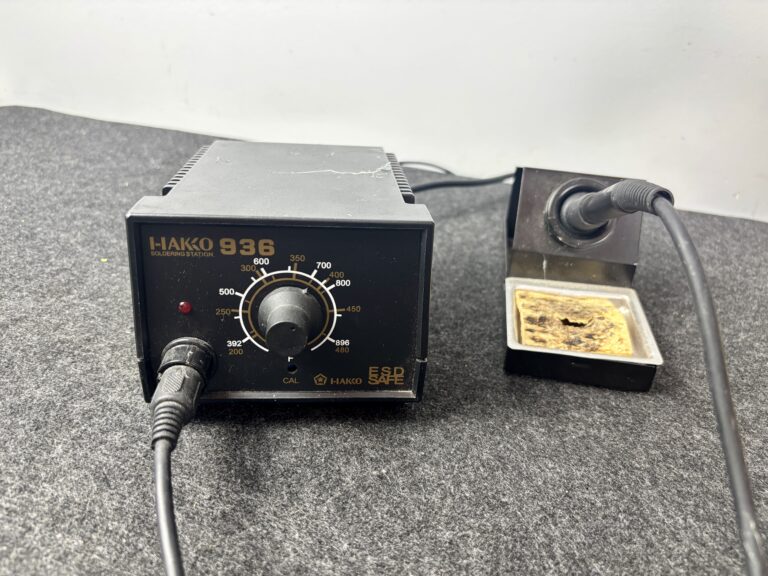
There are various types of soldering irons available out there, and choosing the right one really depends on how you plan to use it and the kind of projects you’re working on. The three most important factors to consider are: temperature control, wattage, and the tip type of the soldering iron.
In my experience, it’s highly recommended to go with a soldering iron that allows adjustable temperature. This gives you way more flexibility. Fixed-temperature irons can be limiting — the preset heat might be too high for leaded solder or too low for lead-free solder, making your work harder than it needs to be. With an adjustable soldering iron, set the optimal temperature based on the solder alloy composition that you use.

This post may contain affiliate links. If you purchase through these links, I may earn a small commission at no extra cost to you. It helps support this blog and keeps the projects coming—thanks for your support!
A soldering station usually includes a base unit with precise temperature control, a detachable iron, and sometimes even a digital display. Some even come with hot air rework tools. The main benefits are:
- More accurate temperature regulation, especially useful for sensitive components
- Stable power delivery, which helps maintain consistent heat during long sessions
- Replaceable tips and parts, so you can upgrade or repair instead of replacing the whole thing
- And, of course, a proper stand and cleaning station, which are underrated until you don’t have them
Quick tip: the temperature control on cheaper irons (and even some stations) often use a simple diac/triac circuit without actual feedback from the tip. So if you’re not soldering for a while, either lower the temp or turn it off completely. Leaving it idle at high heat can damage the tip coating and shorten the iron’s lifespan.
Also worth mentioning: the power plug included in your kit may vary depending on the country it’s being shipped to — always double-check that before ordering internationally.
3. The Soldering Wire
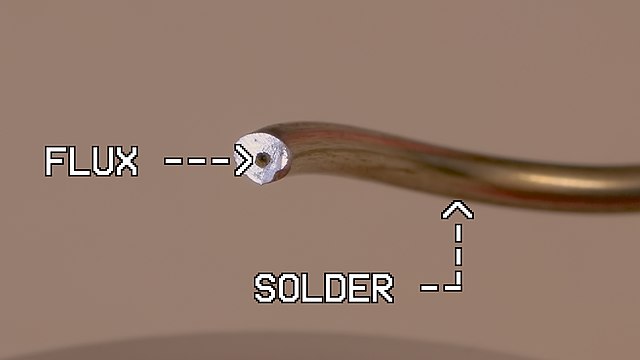
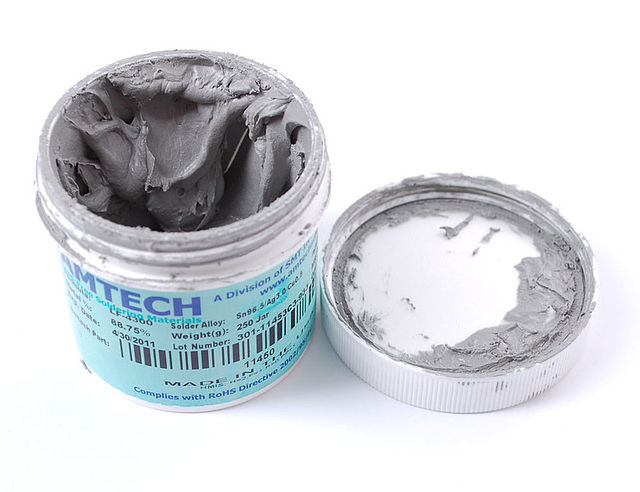
Solder wire is the metal alloy used to join wires and components together when soldering. It’s typically made from materials with a low melting point, allowing it to flow smoothly over metal surfaces and create solid electrical connections.
In my soldering kits, I’ve come across two types of solder wire. One is lead-free, mainly used for products distributed in the EU to comply with RoHS regulations (because lead is considered toxic). The other is lead-based solder wire, more commonly sold in the US, which is tin-lead alloy inside a tube.
Fun fact: The packaging color is usually different by region – blue caps for US, green caps for EU. Meanwhile, some kits include the wire in a spool, especially when bundled with soldering paste.
While lead-free solder is becoming more popular — mainly for environmental and health reasons — from a performance standpoint, I personally find that lead-based solder wire still works better. It melts at a lower temperature (around 183°C or 361°F) and flows much more consistently, especially on oxidized metal surfaces.
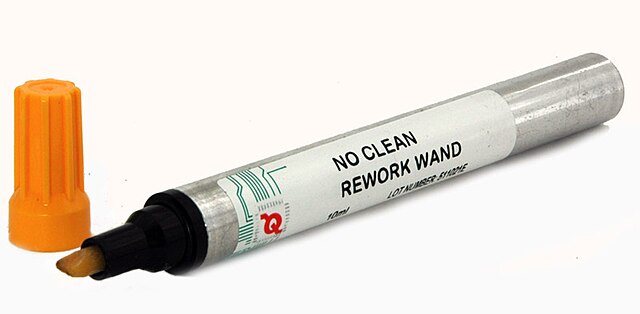
Rosin Core – The Hidden Helper
Most solder wires I’ve used come with a rosin core inside. That’s a built-in chemical (flux) that helps:
- Remove oxides and dirt from metal surfaces
- Improve solder flow
- Make connections more reliable
There are four common types of rosin cores:
- R (Rosin) – pure rosin, no activators, super mild
- RMA (Rosin Mildly Activated) – has light activators, good balance
- RA (Rosin Activated) – stronger cleaning power, more aggressive
- AC (Non-Rosin Activated) – usually acidic, works well without additives
From my experience, RMA core solder is the most practical. It balances cleaning performance, cost, and availability. It’s mild enough for general use but strong enough to clean lightly oxidized surfaces.
There are two main types of solder wire to choose from:
Tin-lead solder (SnPb): easier to work with, lower melting point, flows beautifully
Lead-free solder: better for the environment, but requires higher temps and more technique
4. The Desoldering Pump
As the name suggests, a desoldering pump is used to remove melted solder so you can take out or fix electronic components more easily. It’s a simple, mechanical tool — often called a solder sucker — and it works surprisingly well.
The tip is made of heat-resistant material, usually silicone or Teflon, so it can handle contact with hot solder.

To use it:
- Press down the piston until it locks.
- Heat the solder joint with your iron until the solder melts.
- Place the pump tip next to the joint, then hit the release button.
- It’ll suck up the molten solder with a satisfying little “pop.”
It’s especially handy for fixing mistakes or replacing through-hole components, and honestly, it’s one of the best cheap tools I’ve ever added to my kit.
5. The Soldering Wick
A Soldering wick (also called desoldering braid) is a thin strip of braided copper wire designed to absorb melted solder. It’s most commonly used when you’ve applied too much solder to a joint, or when you need to remove solder from a PCB.
You simply place the wick over the solder you want to remove, press your heated soldering iron on top of it, and the solder gets drawn into the braid by capillary action. Clean and easy.

But here’s something not everyone knows:
Soldering wick can also help you solder SMD (surface mount) parts.
The trick is to intentionally flood all the pins of the chip with solder first — don’t worry if solder bridges form. Once everything is in place and the connections are solid, you use the soldering wick to soak up the excess solder. It leaves the SMD pins neatly soldered to the pads, with no bridges or mess left behind.
This technique works surprisingly well, especially for beginners who struggle with precision soldering on tiny components.
6. The Soldering Iron Stand
A Soldering iron stand is where you safely place your hot soldering iron when you’re not using it. Sounds basic, but it’s essential — it helps prevent accidental burns, damage to your workbench, and unexpected “uh-oh” moments.
Most good stands come with a wet sponge (or space to put one) that you use to clean off the tip, removing excess solder and oxidation. This keeps the iron working properly and your joints clean.

Image by Suyash Dwivedi, licensed under CC BY-SA 3.0 – link
Some basic soldering kits might not include a full-size stand with a sponge. Instead, they come with a micro stand — a smaller, more compact holder that still gets the job done, but without the tip-cleaning feature.
If you’re working often, I’d suggest investing in a proper stand. It’s a small upgrade that makes soldering a lot safer and more convenient.
7. Tweezers
Tweezers are a must-have when working on electronics, especially when dealing with tiny components or surface-mount devices (SMDs). They’re typically made from high-quality stainless steel with anti-static coating, which helps protect sensitive parts from electrostatic discharge (ESD).
They come in two common shapes: straight and curved, each with fine, precise tips designed for high-accuracy tasks.

You’ll find them super useful for:
- Holding small resistors or ICs while soldering
- Grabbing little screws
- Positioning solder wick or wires
- And yes — even handling delicate tasks like coil wicking if you’re into DIY vaping
A good pair of tweezers might not look flashy, but trust me — they save you a ton of frustration when your fingers are just too big for the job.
8. Soldering Iron Tip Set
A soldering iron isn’t complete without its soldering tip — that’s the part at the very end of the iron that actually heats up and melts the solder. It’s usually made from copper with an iron plating, and comes in a variety of shapes and sizes to suit different soldering tasks.
The tip’s angle can range from 22° to 90°, and choosing the right one can make your soldering a whole lot easier and cleaner. Since it’s the part that makes direct contact with your components, it needs to heat evenly and fit properly with your soldering iron.

Soldering tips are interchangeable, so you can switch them out depending on what kind of job you’re doing — whether you’re working on delicate SMDs or thick wires.
In the kits I’ve used, the tips included are mostly 900M-T series. The basic boxed kits usually come with two tip types: B (round) and I (needle-point). That’s enough to get you started, but if you want more flexibility, it’s worth picking up a full tip set later on.
Tip (no pun intended): Always match your tip to your iron model, and keep it clean and tinned for longer life.
9. Mini Wire Stripper Tool
A mini wire stripper is a simple but essential tool when soldering. It lets you strip the insulation off wires and leads cleanly and safely, without damaging the metal underneath.
Most strippers come with multiple notches to fit different wire sizes, so you can use it for anything from jumper wires to thicker power cables. The handle is usually made of plastic, while the blade is metal and sharp enough to get the job done without much effort.

It’s especially useful when you’re prepping wires before soldering, or when you need to trim and punch down excess leads on a PCB.
Once you’ve used one, you’ll wonder why you ever tried stripping wires with your fingernails or a pair of scissors
10. Printed Circuit Board
A PCB (Printed Circuit Board) is the foundation of most electronic projects. It’s the board where you place and solder your components — like resistors, capacitors, ICs, and wires — to build a working circuit.
At its core, a PCB is made of a non-conductive material (usually fiberglass) with a layer of copper traces that act as the electrical pathways, replacing the need for messy jumper wires.

There are different types of PCBs you might use:
- Perfboard / Dot PCB – basic grid of holes, perfect for prototyping
- Stripboard – holes connected in rows by copper strips
- Custom PCBs – designed in software and manufactured, ideal for polished final builds
When soldering, the PCB gives structure and stability to your components, while also defining how they’re connected. It’s basically the stage where the whole performance happens — and your soldering skills are what keep the show running smoothly.
11. Digital Multimeter
A compact digital multimeter is a super useful tool for anyone working with electronics. It lets you measure a range of values, including:
- DC voltage and AC voltage
- DC current
- Resistance
- Diode testing
- Continuity checks
- And more, depending on the model
It’s an essential piece of gear whether you’re in a lab, a workshop, or just tinkering with electronics at home.

If you picked up the Soldering Iron Kit with Multimeter or the Multimeter Kit, this tool should be included.
⚠️ Important: Before using the multimeter, take a few minutes to read the manual. Using it incorrectly can lead to damaged components — or worse, serious injury.
Once you get the hang of it, a multimeter becomes your best friend for diagnosing problems and verifying your circuits are working exactly as expected.
12. Final Thoughts – Get the Basics, Get Soldering
You don’t need a fancy lab or expensive gear to start soldering — just a solid set of basic tools and a bit of practice.
From the soldering iron and tips to the pump, wick, PCB, and mini wire stripper — each tool has its role in making your soldering cleaner, faster, and a whole lot easier.
The gear I mentioned above is what I personally use and recommend for beginners. Start with these, and you’ll be set for most DIY projects, from simple repairs to building full Arduino systems.
Don’t stress about perfection. Just focus on learning, making mistakes, and enjoying the process. Your soldering skills will level up faster than you think