So you’ve already blinked some LEDs like a pro? Nice.
But what if we want the LED to fade in and out — like it’s breathing, like it’s alive, like… your ambition every Monday morning?
Let’s make your Arduino control LED brightness smoothly using just a few lines of code. This one’s gonna look slick
What You’ll Need
- Arduino Uno Starter Kit
- Bread Board
- Jumper Wires
- 5mm LEDs Assortment Pack
- Resistors ( 220 ohms recommended)
This post may contain affiliate links. If you purchase through these links, I may earn a small commission at no extra cost to you. It helps support this blog and keeps the projects coming—thanks for your support!
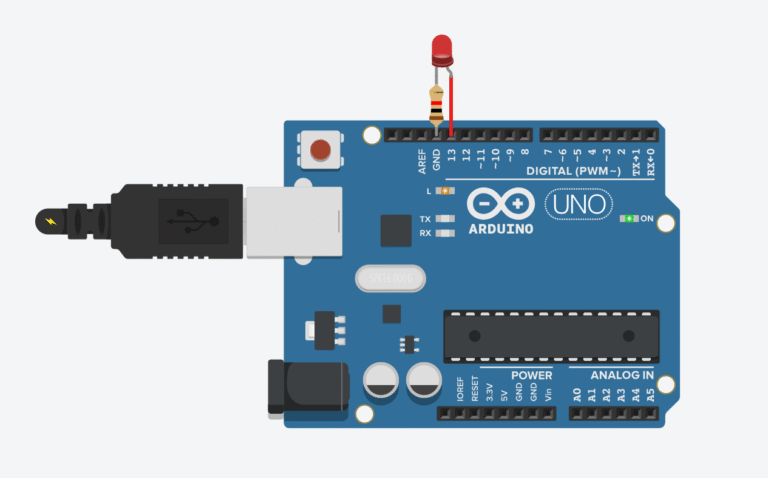
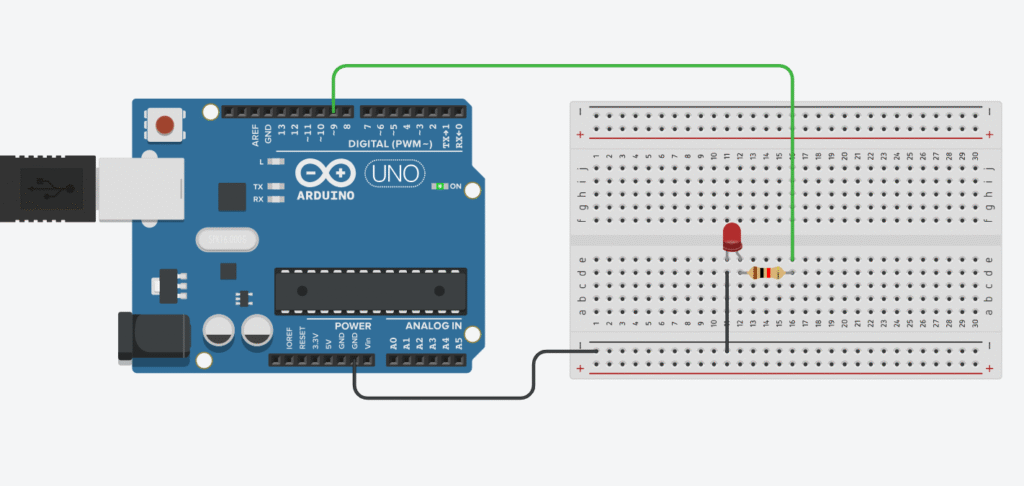
Wiring the LED
Connect the long leg (anode) of the LED through a 220Ω resistor to pin 9 (or any PWM pin).
The short leg (cathode) goes to GND.
PWM pins on most Arduino boards are marked with a ~ symbol (like 3, 5, 6, 9, 10, 11). We’ll use pin 9 in this example.
Why Use a Resistor?
Same rule as before:
LEDs don’t limit current → they’ll fry themselves if you don’t help.
So drop a 220Ω resistor in there. Saves the LED. Saves your pin. Saves your day
The Code
Here’s a simple sketch that gradually increases and decreases the LED brightness.
int ledPin = 9;       // PWM-capable pin
int brightness = 0;   // LED brightness level
int fadeAmount = 5;   // How much to increase/decrease brightness

void setup() {
  pinMode(ledPin, OUTPUT);
}

void loop() {
  analogWrite(ledPin, brightness);  // Set brightness

  brightness = brightness + fadeAmount;  // Update brightness

  // Reverse direction at the ends
  if (brightness <= 0 || brightness >= 255) {
    fadeAmount = -fadeAmount;
  }

  delay(30);  // Wait before next update
}
This code makes the LED “breathe” — fading from off to fully lit, then back again.
How It Works
analogWrite(pin, value)sends a PWM signal (fake analog) to the pin- Value can be between
0(off) and255(fully on) - By increasing or decreasing that value slowly, we get a smooth fading effect
Try These Variations
- Change
delay(30)to make the fade slower or faster - Try
fadeAmount = 10to make the transitions quicker - Use a potentiometer to control brightness manually (stay tuned for that in the next post 👀)
Final Thoughts
Fading an LED isn’t just a cool effect — it’s your entry into the world of analog control.
Once you get this, you’re on your way to dimmable lamps, LED animations, or even custom breathing light effects like a MacBook in sleep mode
Next up? Fading multiple LEDs, or using input to control brightness.
Stick around, it’s gonna get spicy
🔧 Recommended Arduino Starter Kits for Beginners
If you’re just getting started with Arduino, these beginner-friendly kits will help you learn faster and avoid the headache of missing parts. They all include essential components like LEDs, resistors, jumper wires, and an Arduino-compatible board.
- Arduino Official Starter Kit
Includes a genuine Arduino UNO board, project book, and components for 15+ tutorials.
👉 Check it on Amazon - Elegoo UNO R3 Super Starter Kit
Affordable and packed with sensors, LEDs, motors, and wires — great value.
👉 View the Elegoo Kit - Freenove Ultimate Starter Kit
Includes 200+ components, an Arduino-compatible board, and 50+ example projects.
👉 See the Freenove Kit
💡 Tip: Choose a kit with a good variety of components so you can build multiple projects without buying extra parts later.