Making an LED Blink – Your First Line of Arduino Communication
Blinking an LED is often considered the “Hello, World!” of microcontroller programming. It’s one of the very first things you’ll do when learning how to program a new microcontroller. But why start with blinking an LED? Because the same basic techniques you use to connect and control an LED also apply to many other components, like motors, buzzers, or relays.
If you can make an LED blink, you’re already one step closer to controlling the physical world through code. In fact, once you’ve made an LED blink, you’ve just spoken your first word in Arduino’s language — and from there, the conversation only gets more exciting.
What You Need:
- Arduino Uno Starter Kit
- Bread Board
- Jumper Wires
- 5mm LEDs Assortment Pack
- Resistors ( 220 ohms recommended)
This post may contain affiliate links. If you purchase through these links, I may earn a small commission at no extra cost to you. It helps support this blog and keeps the projects coming—thanks for your support!
Understand the LED:
Before you start blinking an LED with code, it’s helpful to understand what an LED actually is and how it behaves in a circuit.
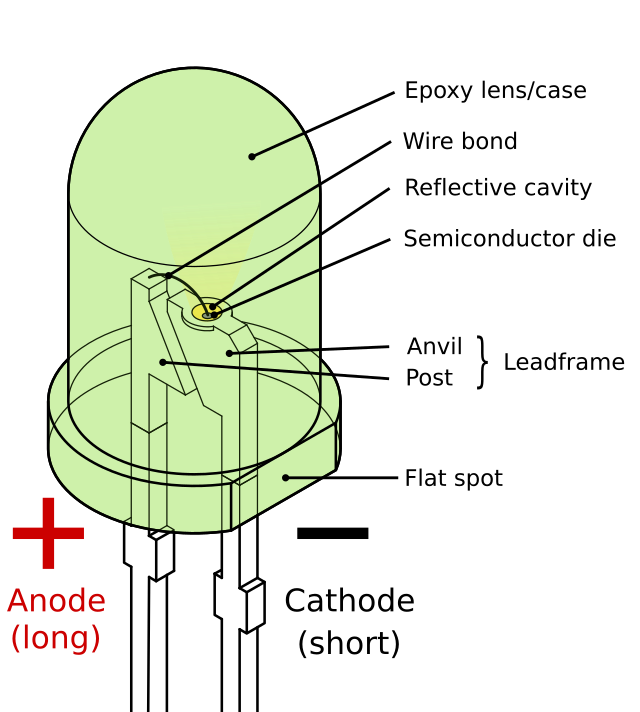
LED stands for Light Emitting Diode. It’s a component that emits light when current flows through it in the correct direction — from the anode (positive leg) to the cathode (negative leg). Unlike regular light bulbs, LEDs only allow current to flow in one direction, which is why orientation matters when you wire them up.
Most LEDs have:
- A longer leg → the anode (positive side)
- A shorter leg → the cathode (negative side)
They also have something called a forward voltage — typically 1.8V to 2.2V for red LEDs, and slightly higher for other colors. This is the minimum voltage required to make the LED light up.
LEDs are sensitive to too much current. That’s why you need a resistor in series — to limit the current and prevent burning out the LED. Without one, the LED will light up… once. And never again.
Also, please — don’t even think about plugging it into 220V AC. Unless you want your house to be the brightest one on the street… for a solid half-second =))
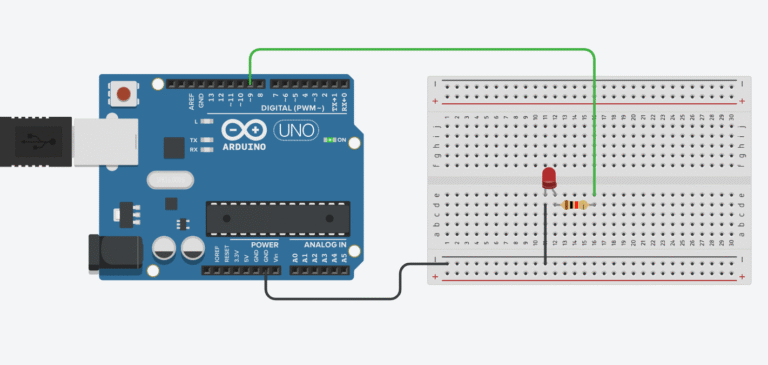
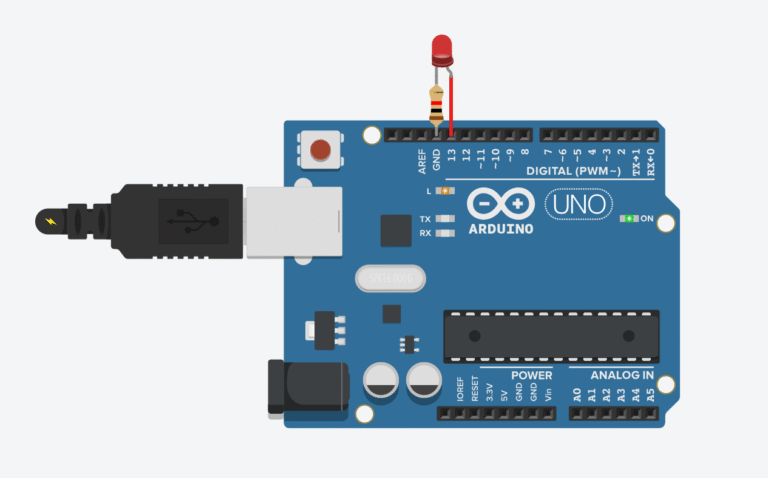
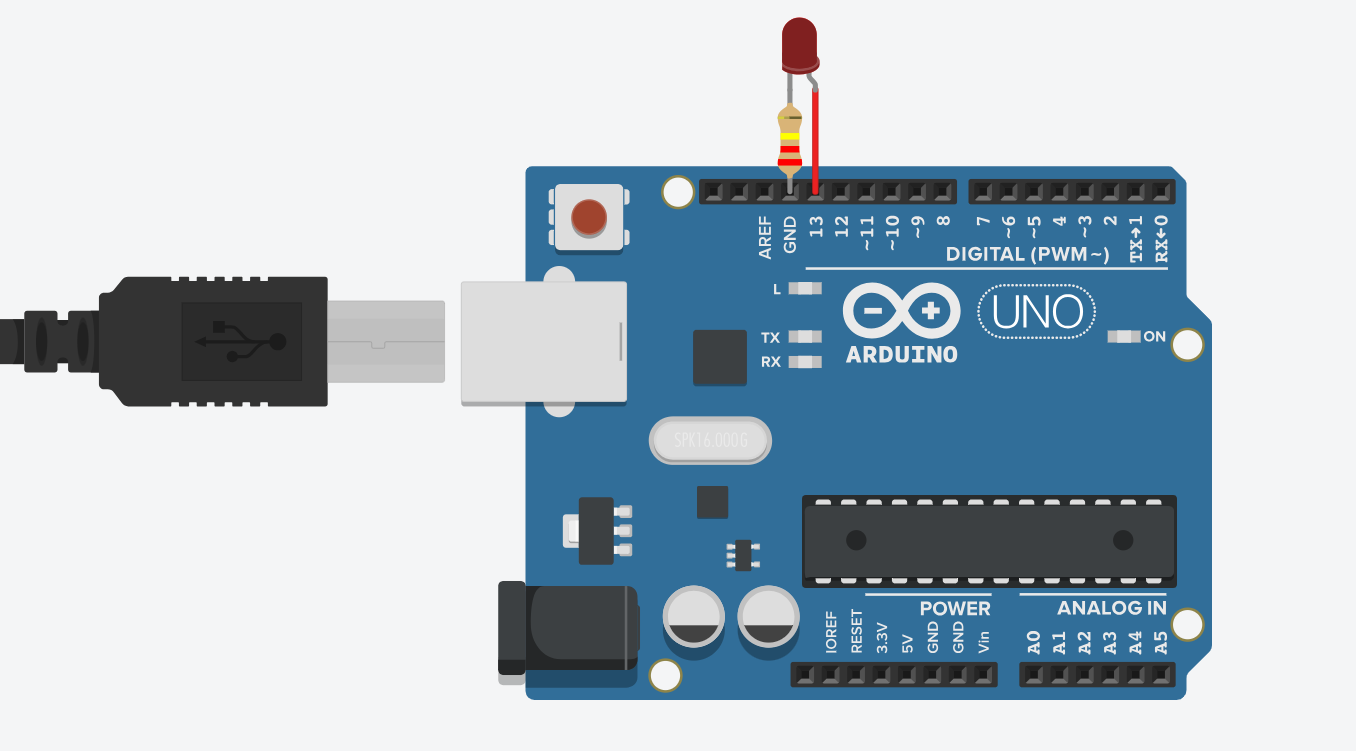
Wiring the LED Circuit

- Connect the long leg (anode) of the LED to digital pin 13 on the Arduino through a 220-ohm resistor.
- Connect the short leg (cathode) of the LED to the GND pin.
- If you’re using a breadboard, place the LED and resistor in line and use jumper wires to connect them to the Arduino.
The resistor plays a critical role in protecting both your LED and the Arduino by limiting the amount of current that flows through the circuit. Without it, you risk burning out the LED or even damaging the output pin on your board.
To choose the right resistor, you can apply Ohm’s Law (V = IR). Take the supply voltage (typically 5V for Arduino UNO) and subtract the LED’s forward voltage (around 1.8V–2.2V for red LEDs). That difference is what the resistor needs to “handle.” For example, a 220-ohm resistor is commonly used with a 5V board like the UNO – it keeps the current at a safe level and makes sure everything runs smoothly.
Want to tweak the LED brightness? You can adjust the resistor value – lower values make it brighter (but don’t go too low!), while higher values dim the light. In general, even a 1K ohm resistor will still make the LED visible with a 5V supply.
// Basic LED Blink
// Lee Curiosity
void setup() {
  pinMode(13, OUTPUT); // Set digital pin 13 as output
}

void loop() {
  digitalWrite(13, HIGH); // Turn LED on
  delay(1000);            // Wait for 1 second
  digitalWrite(13, LOW);  // Turn LED off
  delay(1000);            // Wait for 1 second
}
Breaking Down the Code:
setup(): This runs once when the Arduino is powered on or reset. We use it to define pin 13 as an output.loop(): This runs forever. Inside it, we turn the LED on, wait for a second (1 second equals 1000 milliseconds), then turn it off and wait again.digitalWrite(pin, HIGH/LOW): Sends voltage to the pin (HIGH = on, LOW = off).delay(time): Pauses the program for the given time in milliseconds.
Common Mistakes to Watch Out For
- LED not lighting up? Double-check the orientation (long leg = positive).
- No blink? Make sure the correct board and COM port are selected in the Arduino IDE.
- Burnt out LED? You might have forgotten the resistor. Oops.
That’s it! You just made your Arduino blink an LED. It might seem small, but it’s a powerful moment. You just turned lines of code into something you can see in the real world. From here, you can move on to buttons, sensors, motors, and beyond.
Every great project starts with a blink. Welcome to the world of physical computing!
Recommended Kits for Beginners:
Elegoo Uno Super Starter Kit – perfect for learning and building
Solderless Prototyping Breadboard Kit
🔧 Recommended Arduino Starter Kits for Beginners
If you’re just getting started with Arduino, these beginner-friendly kits will help you learn faster and avoid the headache of missing parts. They all include essential components like LEDs, resistors, jumper wires, and an Arduino-compatible board.
- Arduino Official Starter Kit
Includes a genuine Arduino UNO board, project book, and components for 15+ tutorials.
👉 Check it on Amazon - Elegoo UNO R3 Super Starter Kit
Affordable and packed with sensors, LEDs, motors, and wires — great value.
👉 View the Elegoo Kit - Freenove Ultimate Starter Kit
Includes 200+ components, an Arduino-compatible board, and 50+ example projects.
👉 See the Freenove Kit
💡 Tip: Choose a kit with a good variety of components so you can build multiple projects without buying extra parts later.