If you’re just getting started with Arduino, you’ve likely come across two of the most popular boards: the Arduino Uno and the Arduino Nano. Both are powered by the same microcontroller — the ATmega328P — and support the full range of Arduino functions and libraries.
However, despite their technical similarities, these boards differ significantly in terms of size, USB interface, pin layout, and how they’re used in real-world projects. The Uno is often the go-to choice for beginners due to its simplicity and compatibility with shields, while the Nano excels in compact and embedded applications.
In this article, we’ll break down their technical specifications, highlight their key strengths and trade-offs, and share practical insights to help you choose the right board for your next DIY electronics project — whether you’re learning, prototyping, or building something permanent.
Let’s find out which one best suits your needs.
What is Arduino Uno?
The Arduino Uno is widely recognized as the flagship board of the Arduino ecosystem. Whether you’re a complete beginner, an educator, or an engineer working on industry-grade solutions, the Uno R3 is most likely to meet your needs.
🛒 Looking to get started with the Uno? Here’s the Arduino Uno kit I recommend — perfect for beginners and hobbyists.
Getting started with electronics:
If you’re new to electronics and coding, the Uno R3 is the most accessible and well-documented board in the Arduino lineup. You can find plenty of tutorials for this board, whether on YouTube or even on Arduino’s official website. I’d say probably around 80% of beginner Arduino projects you’ll find online are built using the Uno. That’s why it’s popular.
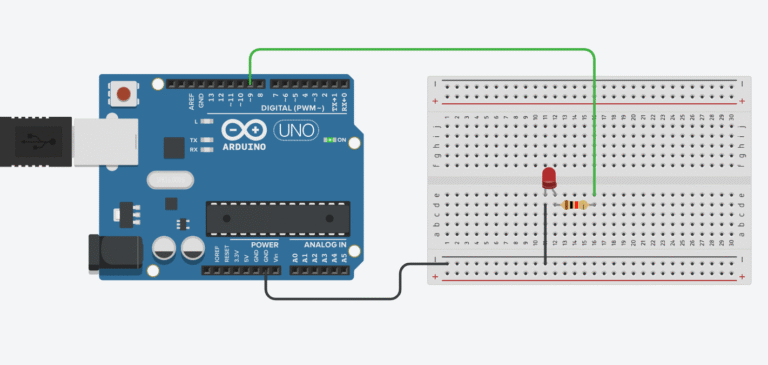
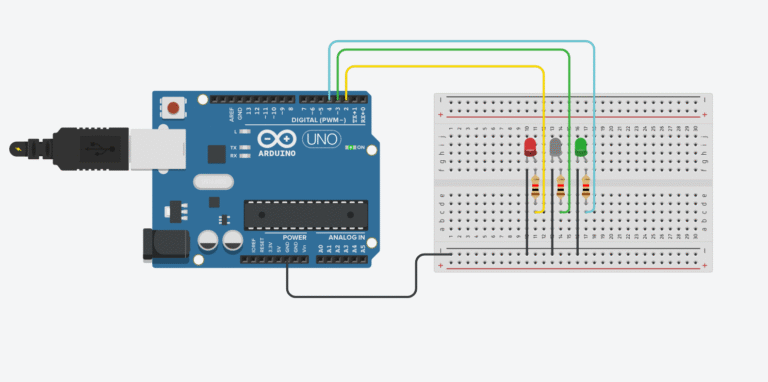
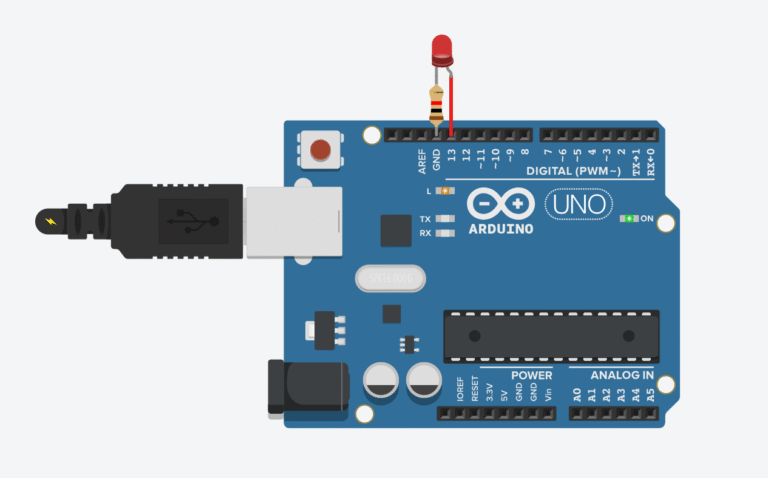
The Arduino Uno is equipped with the well-known ATmega328P processor, 14 digital I/O pins, 6 analog input pins, USB connectivity, an ICSP header, and a reset button on board. This board includes everything you will need for a great first experience with Arduino, such as blinking LEDs, controlling motors or servos, etc
This post may contain affiliate links. If you purchase through these links, I may earn a small commission at no extra cost to you. It helps support this blog and keeps the projects coming—thanks for your support!
Educational Use
The Uno R3 has been around for more than 10 years, and it’s still one of the most common boards used in schools, universities, and electronics workshops. It’s simple to use, reliable, and perfect for helping students learn how to build circuits and write code.
Many teachers use the Uno to teach basic programming, sensor control, and simple automation. For example, students can build an obstacle-avoiding robot, a light-following robot, or a system that turns on a fan when the room gets too hot. You’ve probably seen some of them in the Robot competition, right?
Check out my project here. It’s one of my projects using an Arduino Uno R3.
Besides classroom use, the Uno is also great for science experiments. It can collect real-time data from sensors and send it to a computer for analysis, or trigger lab tools based on specific input conditions. Because it’s easy to understand and works with many types of sensors and modules, the Uno is a great tool for both learning and exploring new ideas.
Industry applications:
Beyond hobby projects, the Uno R3 is also adopted by various companies as the core controller in industrial systems, including custom PLC (Programmable Logic Controller) setups. Its stability and ease of integration make it a practical choice for prototyping and deployment in automation workflows.
What is Arduino Nano?
The Arduino Nano is one of the smallest and most compact boards in the Arduino family. Despite its tiny size, it offers nearly the same features as the Uno and is a great choice for makers who want to build small, space-saving projects. Whether you’re a beginner working on simple ideas or an advanced user embedding a board into a final product, the Nano is an excellent tool to have.

📦 If you’re working on compact projects, check out this Arduino Nano kit. It’s small, reliable, and great for embedded builds.
Getting started with electronics:
The Nano is also a good option for beginners — especially if you’re planning to build compact devices like mini robots, wearables, or embedded systems. While the Uno is more beginner-friendly in terms of setup and debugging, the Nano gives you the same power in a smaller form factor.
It uses the same ATmega328P microcontroller as the Uno, and comes with 14 digital I/O pins, 8 analog input pins, USB Mini-B (or Type-C in some versions), and a reset button. You can run almost any basic Arduino project on a Nano, including blinking LEDs, controlling sensors, motors, or servos, just with less space on your desk.
There are also many tutorials online for the Nano — not as many as the Uno, but definitely enough to help you get started. And once you get used to it, you’ll love how flexible it is when space is limited.
Educational Use
Although the Nano is not as widely used in education as the Uno, it’s still a very practical option for classroom projects that require compact and portable builds. Some teachers prefer Nano when students are working on wearable devices, small robots, or soldered projects on a PCB.
Check out my project here. It’s one of my projects using an Arduino Nano.
The Nano helps students understand the idea of embedded systems and space-optimized circuit design. It’s great for hands-on learning, and many schools use it for projects like gesture-controlled gadgets, temperature sensors in small enclosures, or even line-following bots that fit in the palm of your hand.
Because the Nano is fully Arduino-compatible and supports all the same libraries and functions, it’s a great tool for both learning and moving on to more complex, real-world applications.
Industry Applications
The Nano is also used in various real-world applications, especially when size and weight matter. You’ll often find it embedded in final products — from small IoT devices to custom automation tools.
Many makers use the Nano in combination with custom PCBs, since its small size makes it easy to solder directly onto a board. It’s perfect for building custom sensors, smart gadgets, and low-power automation systems.
While it may not be the first choice for rapid prototyping like the Uno, the Nano really shines when you’re ready to move from testing to building a finished product that just works — and fits.
What is the difference between Arduino Uno and Arduino Nano?
| Feature | Arduino Uno | Arduino Nano |
|---|---|---|
| Microcontroller | ATmega328P | ATmega328P |
| Clock Speed | 16 MHz | 16 MHz |
| Flash Memory | 32 KB | 32 KB |
| Digital I/O Pins | 14 (6 PWM) | 14 (6 PWM) |
| Analog Input Pins | 6 | 8 |
| USB Port | USB Type-B (large) | Mini USB / USB-C (newer versions) |
| Size | Larger (68.6mm x 53.4mm) | Smaller (approx. 45mm x 18mm) |
| Breadboard-Friendly | ❌ No | ✅ Yes |
| Reset Button | ✅ Yes | ✅ Yes |
| ICSP Header | ✅ Yes | ✅ Yes |
| Power Supply Options | USB / Barrel Jack / Vin pin | USB / Vin pin |
| Use Case | Best for learning, prototyping on breadboard | Best for compact builds, final embedded projects |
| Price (avg) | Slightly higher (~$5–8) | Slightly cheaper (~$3–6) |
| Shields Support | ✅ Many official Arduino shields available | ❌ Not designed for shields |
| Popularity | Most popular, widely documented | Popular, but less documented than Uno |
When to Choose the Arduino Uno
The Uno is widely considered the “default” Arduino board, and for good reason. It’s beginner-friendly, has a standard layout for shields, and provides a stable platform for learning how to build circuits and write code.
Choose Uno if:
- You’re new to Arduino and want something easy to work with.
- You prefer a full-sized board for prototyping on a workbench.
- You want more robust USB connectivity (USB-B is rock solid).
- You plan to use Arduino shields.
In short, Uno is perfect for learning, experimenting, and getting comfortable with the Arduino ecosystem.
When to Choose the Arduino Nano
The Nano is compact, versatile, and ideal for embedding into finished projects where space is limited. It offers the same functionality as the Uno but in a smaller footprint.
Choose Nano if:
- You’re working on a project that requires minimal space (like a robot or wearable).
- You plan to solder the board directly onto a custom PCB.
- You want a cost-effective solution for deploying multiple units.
- You need more analog inputs (Nano has 8 vs Uno’s 6).
In short, Nano is great for real-world deployment and compact designs.
Hands-on Perspective: What I Use Personally
In my own projects, I often start prototyping with an Uno — it’s just easier to plug and unplug things without worrying about tight spaces.
But once the project is ready to go live, I’ll switch to a Nano for its size and flexibility.
If you’re like me — working on small robots, sensors, or compact gadgets, Nano will probably become your go-to board pretty quickly.
If you’re just starting out, grab an Uno and explore. Once you’re comfortable, you’ll naturally know when it’s time to switch to a Nano.
💡 Not sure which board to start with? Grab a full Arduino Starter Kit — it comes with all the essential components to follow along with most beginner tutorials.
Want to see real projects built with both boards? Check out my YouTube channel or browse more articles on this blog for tutorials and ideas.