Physical Address
304 North Cardinal St.
Dorchester Center, MA 02124
Physical Address
304 North Cardinal St.
Dorchester Center, MA 02124

Hey makers! Let me tell you a quick story. A few weeks ago, I was at home, staring at a bunch of leftover parts from older Arduino projects—motors, wheels, a dusty HC-05 Bluetooth module, and an Uno board that’s seen better days.
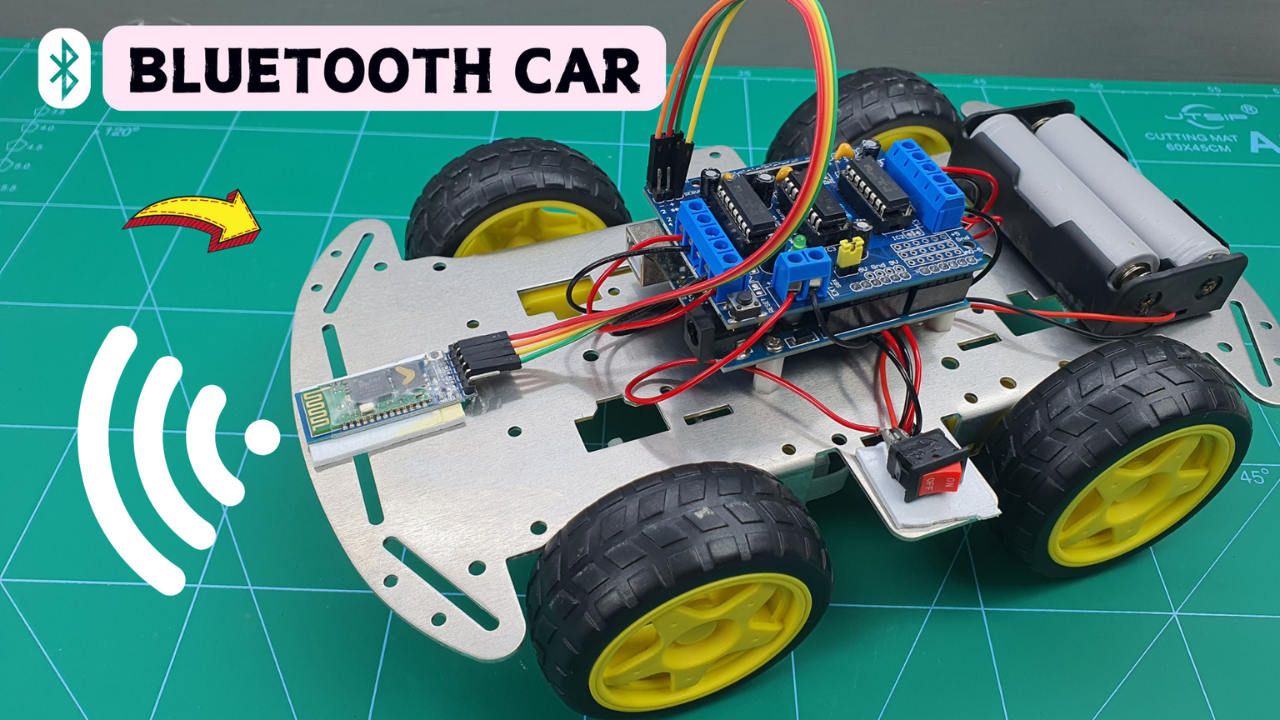
I thought to myself, “Hmm, Why not build something fun with all this?” That’s when the idea hit: a Bluetooth-controlled 4WD robot car. No remote controls, no Wi-Fi headaches—just pure Bluetooth joy, controlled straight from my phone.
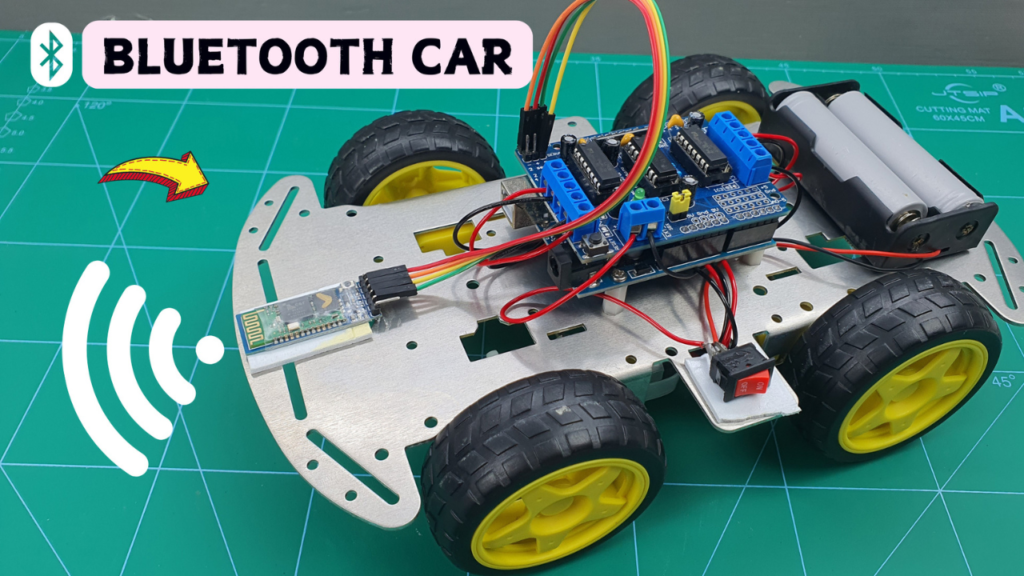
In this tutorial will show you how to build a 4WD robot controlled via Bluetooth using an Android smartphone. It’s a straightforward project suitable for beginners and a great way to learn about motor control, Bluetooth communication, and Arduino basics. So let’s get started.
Actually, I made a video about this project! So if you run into any issues along the way, watching that video is probably the easiest way to figure things out.
Here’s the gear you’ll need to bring this little robot to life:
This post may contain affiliate links. If you purchase through these links, I may earn a small commission at no extra cost to you. It helps support this blog and keeps the projects coming—thanks for your support!
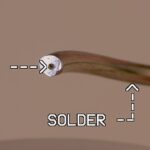
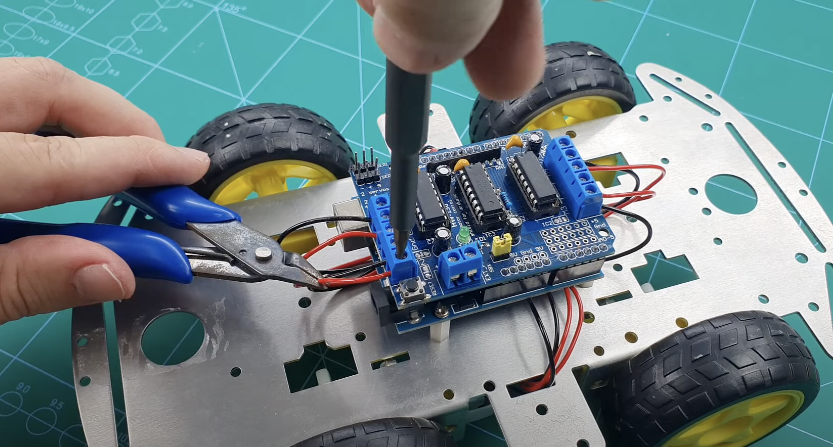
First, let’s start by soldering wires to all four motors. If you bought pre-wired motors, then you can skip this step. But if not—and especially if you don’t own a soldering iron yet—it’s a good idea to get one. It’ll come in handy for all kinds of DIY projects.

I’m currently using the Hakko 936, and it works great for me.If you’re looking for something similar, check out this Amazon link for a few solid picks.
When soldering the wires, don’t worry about motor polarity for now. Just connect two wires to each motor. If it ends up spinning the wrong way, you can simply reverse the wires later. Easy fix!

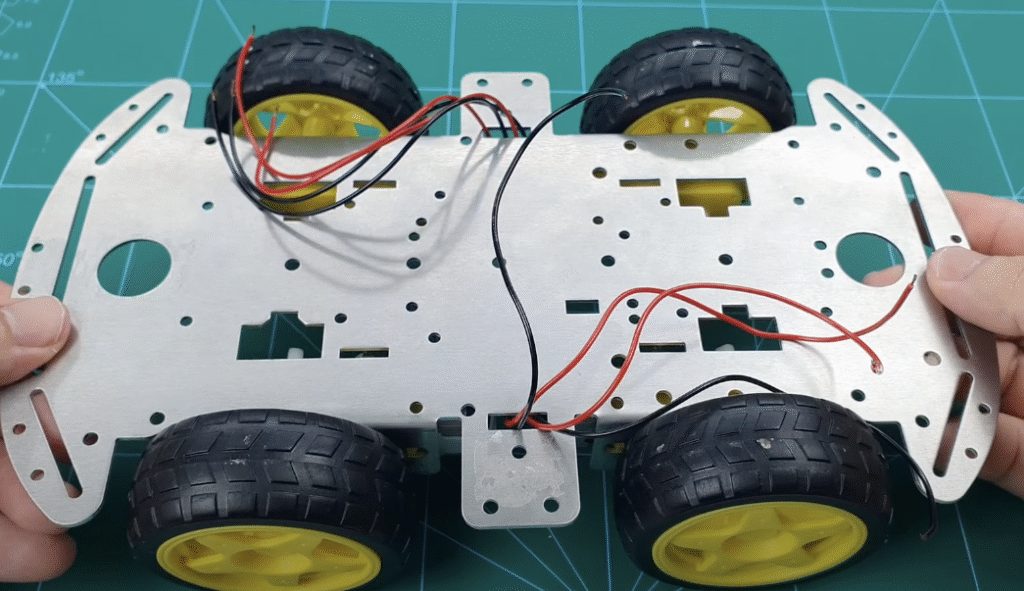
Now let’s mount the four motors onto the chassis using eight M3x45 bolts. This part’s pretty straightforward—just line things up, toss in the bolts and nuts, and if you’ve got a power screwdriver, use it to save some time (and your wrists ). No worries if not though, manual tightening still gets the job done.

After that, go ahead and attach all four wheels. And just like that, the basic frame is done! It’s not moving yet, but it already looks ready to take off, doesn’t it?
Next, let’s mount the Arduino board onto the chassis using four M3x10 female-female standoffs. This part is mostly for clean setup and aesthetics—if you’re feeling lazy, hot glue works too 😆
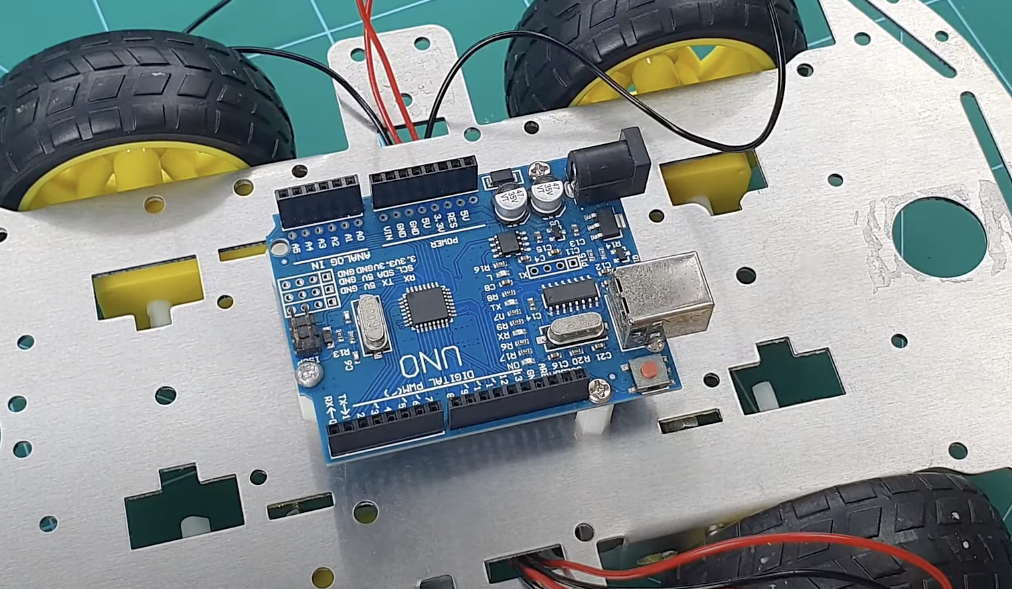
Just screw them in with a screwdriver and you’re good to go.
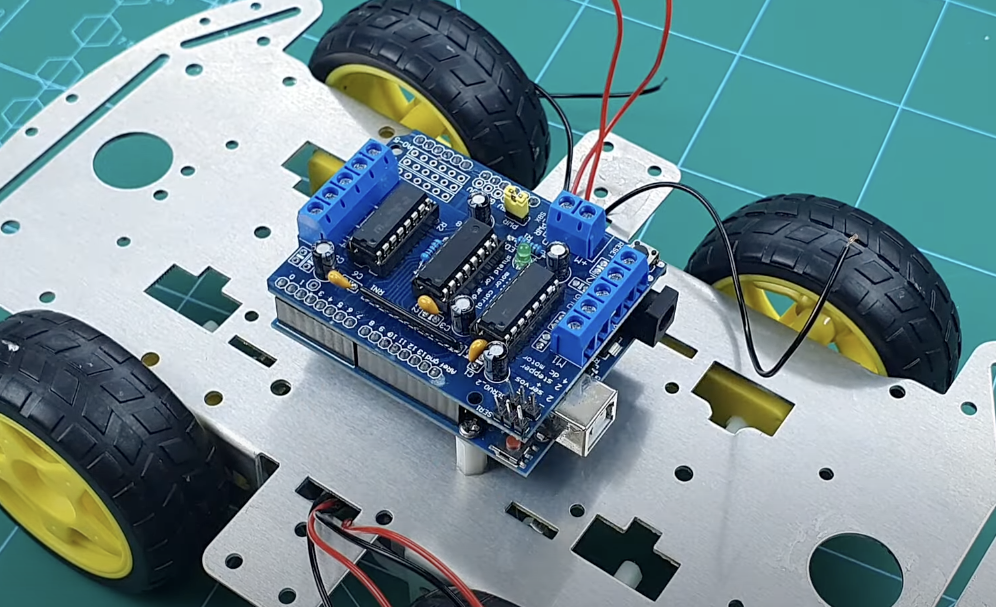
After that, plug the motor driver directly into the Arduino Uno R3. It’s super simple. If anything’s unclear, I’ve got a video demo for this part—check it out to see exactly how it’s done.
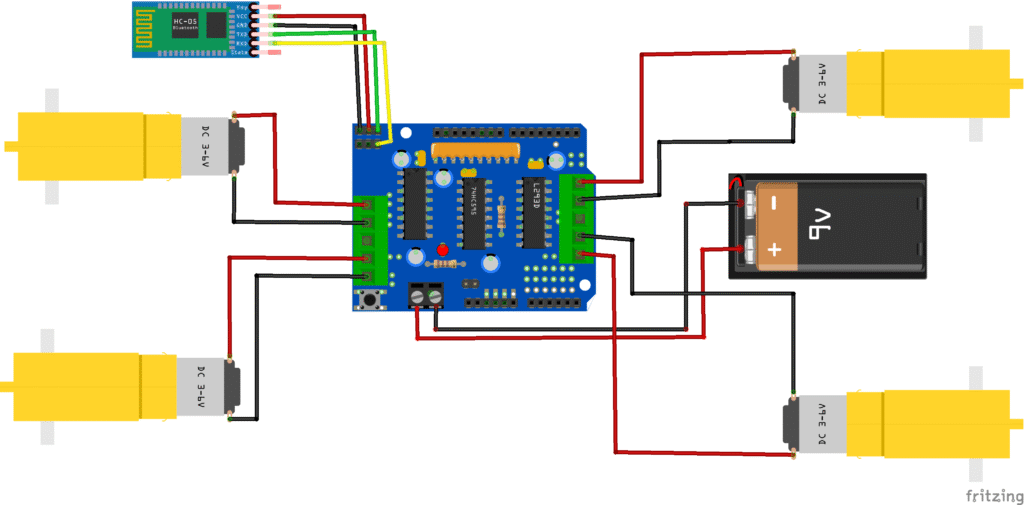
Now we’re moving on to wiring everything up—so pay extra attention here! Especially when it comes to power polarity. Mixing up VCC and GND is the fastest way to fry your board, and no one wants to order a new Arduino just because of one careless moment.
For the motors:
As I mentioned earlier, if the car moves in reverse, just swap the motor wires to fix the direction. Easy fix.
That wraps up the motor section—now let’s hook up the Bluetooth module (HC-05).
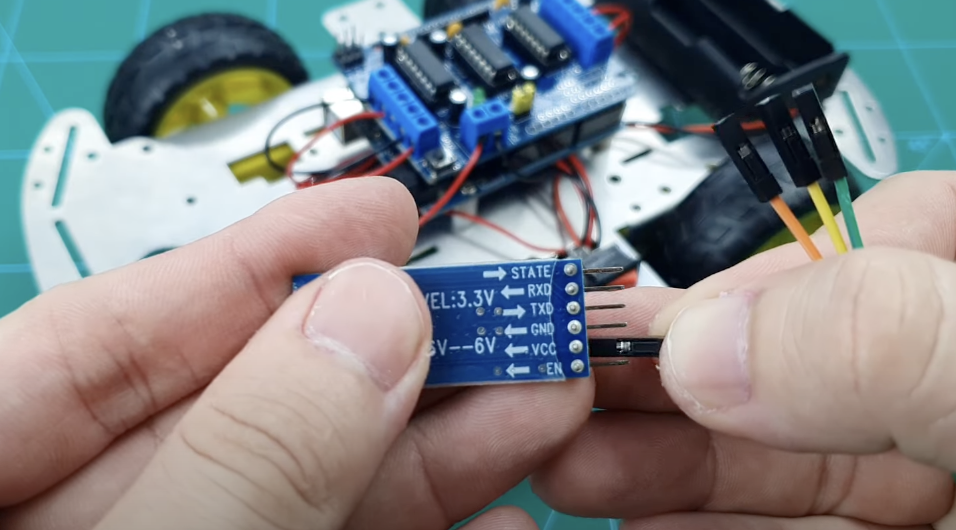
The HC-05 has four pins:
⚠️ Important: The HC-05 uses 3.3V logic on RX, while Arduino pins are 5V. Some people risk it, some use a voltage divider—just know the risk and proceed accordingly
Double-check all connections. One loose wire and your robot becomes a very expensive paperweight.
Use the Arduino IDE and upload your control sketch. Disconnect the HC-05 module before uploading, or it might block the serial port.
Here’s a basic code snippet:
//first , you need to insstall the motor driver for L293D motor driver
// Go to Sketch-> Include Librabry-> Manage Library-> Search for Adafruit Motor Shield V1
#include <AFMotor.h>
#include <SoftwareSerial.h>

SoftwareSerial HC05(9, 10); // RX, TX

//initial motors pin
AF_DCMotor motor1(1);
AF_DCMotor motor2(2);
AF_DCMotor motor3(3);
AF_DCMotor motor4(4);

char command;

void setup()
{
  HC05.begin(9600);  //Set the baud rate to your Bluetooth module.
}

void loop() {
  if (HC05.available() > 0) {
    command = HC05.read();

    Stop(); //initialize with motors stoped

    switch (command) {
      case 'F':
        forward();
        break;
      case 'B':
        back();
        break;
      case 'L':
        left();
        break;
      case 'R':
        right();
        break;
    }
  }
}

void forward()
{
  motor1.setSpeed(255); //Define maximum velocity
  motor1.run(FORWARD);  //rotate the motor clockwise
  motor2.setSpeed(255); //Define maximum velocity
  motor2.run(FORWARD);  //rotate the motor clockwise
  motor3.setSpeed(255); //Define maximum velocity
  motor3.run(FORWARD);  //rotate the motor clockwise
  motor4.setSpeed(255); //Define maximum velocity
  motor4.run(FORWARD);  //rotate the motor clockwise
}

void back()
{
  motor1.setSpeed(255); //Define maximum velocity
  motor1.run(BACKWARD); //rotate the motor anti-clockwise
  motor2.setSpeed(255); //Define maximum velocity
  motor2.run(BACKWARD); //rotate the motor anti-clockwise
  motor3.setSpeed(255); //Define maximum velocity
  motor3.run(BACKWARD); //rotate the motor anti-clockwise
  motor4.setSpeed(255); //Define maximum velocity
  motor4.run(BACKWARD); //rotate the motor anti-clockwise
}

void left()
{
  motor1.setSpeed(255); //Define maximum velocity
  motor1.run(FORWARD); //rotate the motor clockwise
  motor2.setSpeed(50); //Define lower velocity
  motor2.run(FORWARD); //rotate the motor clockwise
  motor3.setSpeed(255); //Define maximum velocity
  motor3.run(FORWARD);  //rotate the motor clockwise
  motor4.setSpeed(50); // Define lower velocity
  motor4.run(FORWARD);  //rotate the motor clockwise
}

void right()
{
  motor1.setSpeed(50); //Define lower velocity
  motor1.run(FORWARD);  //rotate the motor clockwise
  motor2.setSpeed(255); //Define maximum velocity
  motor2.run(FORWARD);  //rotate the motor clockwise
  motor3.setSpeed(50); //Define lower velocity
  motor3.run(FORWARD); //rotate the motor clockwise
  motor4.setSpeed(255); //Define maximum velocity
  motor4.run(FORWARD); //rotate the motor clockwise
}

void Stop()
{
  motor1.setSpeed(0);  //Define minimum velocity
  motor1.run(RELEASE); //stop the motor when release the button
  motor2.setSpeed(0);  //Define minimum velocity
  motor2.run(RELEASE); //rotate the motor clockwise
  motor3.setSpeed(0);  //Define minimum velocity
  motor3.run(RELEASE); //stop the motor when release the button
  motor4.setSpeed(0);  //Define minimum velocity
  motor4.run(RELEASE); //stop the motor when release the button
}
To control the robot via Bluetooth, start by installing a compatible controller app on your Android device.
You can download the APK file here.
This project is not supported on iOS due to HC-05 limitations.
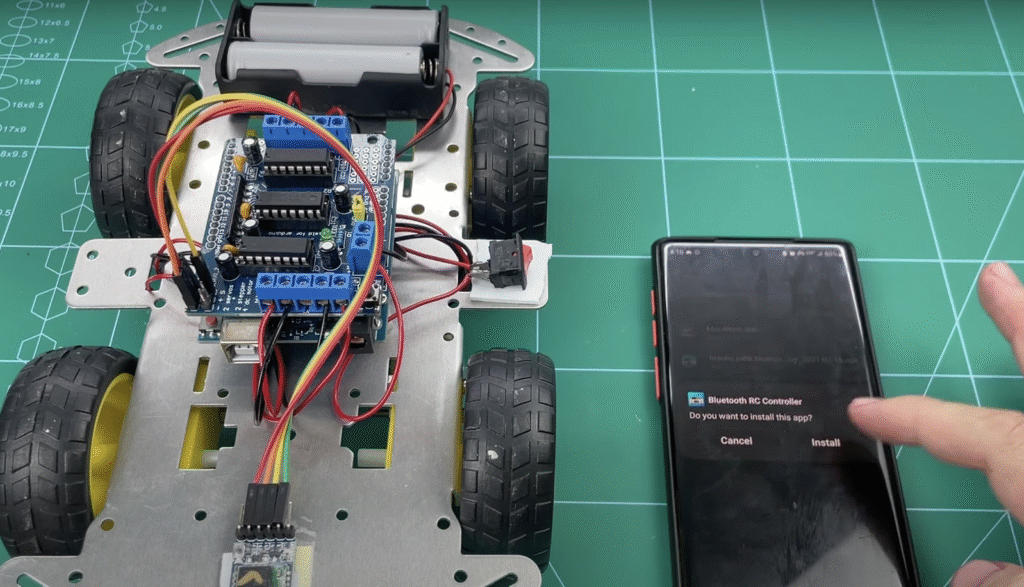
Once installed, power up the robot and pair your device with the HC-05 module (default pairing code: 1234 or 0000).
Use the app to assign directional controls: F (forward), B (backward), L (left), R (right), and S (stop).
You should now be able to control the robot in real-time from your smartphone.
And there you have it—a Bluetooth-controlled 4WD robot you built yourself. Whether you’re into automation, RC fun, or just want to flex at your next maker meetup, this project’s a solid win. Plus, it’s a great intro to wireless control, motor logic, and Arduino basics.
Thanks for reading! If you enjoyed this, share your version with me—I’d love to see what you come up with. Until next time: build more, worry less.
If you’re just getting started with Arduino, these beginner-friendly kits will help you learn faster and avoid the headache of missing parts. They all include essential components like LEDs, resistors, jumper wires, and an Arduino-compatible board.
💡 Tip: Choose a kit with a good variety of components so you can build multiple projects without buying extra parts later.