3D printing is more than just owning a printer and loading up some filament. To consistently produce clean, accurate, and reliable prints — and avoid common headaches — you need a full set of tools covering everything from setup to post-processing.
Whether you’re a total beginner or just upgrading your printing station, here’s your in-depth guide to all the tools you need, why you need them, and which ones are worth getting.
Bed-Leveling and Calibration Tools
Getting the first layer right is absolutely critical. An uneven bed means failed prints, bad adhesion, and hours wasted. Even with auto-leveling, proper calibration is still a must.
- Feeler gauges (or even just a sheet of printer paper) help check the nozzle-to-bed distance. You slide the gauge between the nozzle and the bed to feel for slight resistance — the “just right” zone.
- Digital dial indicators offer precise Z-offset tuning. They’re helpful if you’re printing with 0.1mm layers or need to level a warped bed.
- Auto bed leveling sensors like the BLTouch or CR-Touch upgrade your printer to measure multiple bed points automatically, correcting for dips and warps in real time.
Print Removal Tools
Removing prints safely without gouging the surface or cracking your model? That’s where specialized removal tools shine.
- Flexible spring steel build plates snap prints off with a flex — no scraping needed. Great for PLA, PETG, and other materials that contract slightly while cooling.
- Thin metal spatulas or scrapers help pry off stubborn prints. Look for a sharpened but smooth-edged version that won’t damage your surface. Avoid kitchen knives — seriously.
- Plastic wedges or dental picks are best for intricate or fragile prints. These tools gently lift without leaving marks or stress points on small models.
👉 Recommended: 3D Printer Tool Kit
Cleaning and Maintenance Supplies
Your printer is a machine — and like all machines, it needs care. Regular cleaning keeps it printing well and extends its lifespan.
- Nozzle cleaning needles or brass brushes remove carbon buildup and clogged filament residues.
- Isopropyl alcohol (IPA 90% or higher) keeps build plates squeaky clean and removes oils that cause poor adhesion.
- PTFE or lithium grease lubricates lead screws and linear rods, reducing wear and eliminating binding.
- Compressed air blasts dust and debris out of fans, heat sinks, and boards.
Tip: Keep a small maintenance log to track cleaning sessions, nozzle replacements, and upgrades.
Measurement and Inspection Tools
To ensure dimensional accuracy, especially for mechanical or functional parts, precise measurement tools are a must.
- Digital calipers give measurements down to 0.01mm. Use them for checking tolerances, wall thicknesses, and filament diameters. Absolutely essential if you’re designing your own models or dialing in slicer settings.
- Steel rulers and engineer’s squares are perfect for checking flatness, alignment, and print dimensions.
- Filament diameter gauges help detect inconsistent filament, which can mess up extrusion. Calipers can work too, but specialized gauges are more precise for quick checks.
Caliper pick: VINCA Digital Caliper
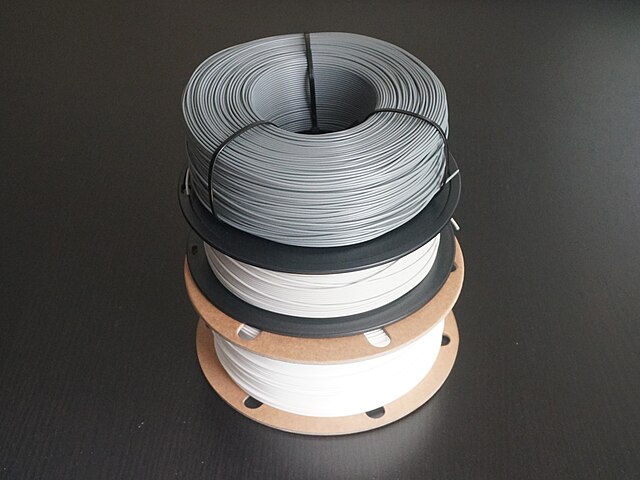
Filament Handling & Storage Tools
Moisture ruins filament — literally. Wet filament causes stringing, bubbling, weak layers, and inconsistent flow.
- Dry boxes (like Creality Official Filament Dryer Box) let you feed filament directly while keeping it protected.
- Filament dryers (like Sunlu FilaDryer S2) can revive soggy spools after exposure to humid air.
- Vacuum seal bags with silica gel packs are perfect for storing rarely used spools long-term.
Tip: Always dry and seal materials like PETG, Nylon, and TPU — they absorb water fast.
Post-Processing Tools
Post-processing helps elevate prints from “okay” to “polished.” It also ensures better functionality for parts that must fit together.
- Flush cutters snip off support material cleanly without tearing the surface.
- X-Acto knives or deburring tools help trim small artifacts and stringing. Perfect for PLA or resin prints.
- Sandpaper (grits from 100 to 2000) smooths down surfaces and gets rid of minor layer lines.
- Needle files are great for refining small holes, slots, and joints.
- For resin users: a wash and cure station, nitrile gloves, and IPA are essential for cleaning and final curing.
Starter kit: Creality 3D Printer Tool Kit
Bonus Tools That Make Life Easier
These aren’t mandatory — but they’ll make your workflow smoother and save you tons of time:
- OctoPrint or Klipper setups let you control your printer remotely and track performance in real time.
- Magnetic tool mats or pegboards help you stay organized so you’re not scrambling mid-print.
- Digital thermometer/hygrometer helps monitor your filament storage environment.
- Label makers are surprisingly handy for tracking filament types, nozzle sizes, or tool drawers.
FAQ – Tools & Accessories for 3D Printing
Do I need all these tools to start 3D printing?
No, start with the basics: scraper, caliper, IPA, and cutters. Add more tools as you scale up.
Can I use regular household tools instead?
Some yes, but many aren’t safe or effective for 3D printing. A proper scraper, for instance, won’t scratch your bed like a kitchen knife might.
How often should I perform maintenance?
Wipe down your bed every few prints. Do a full check (grease, tighten, clean) monthly or every 30–50 print hours.
Is filament storage that important?
Absolutely — moisture kills print quality. If you live in a humid climate, dry boxes and silica packs are must-haves.
Do I really need a caliper?
If you want precise fitment or build your own models, yes. You’ll use it more than you expect.
Which tool gives the biggest improvement for cheap?
Flush cutters or a scraper. They drastically reduce print cleanup time.
I’m doing resin printing — what tools do I need extra?
Add gloves, IPA, wash/cure station, and a resin filter funnel. Also: lots of paper towels.
Final Thoughts
Having the right tools turns 3D printing from frustrating to fun. These aren’t “nice-to-haves” — they’re the secret sauce to better prints, fewer failures, and a smoother workflow.
Start small, invest gradually, and build your toolkit as your projects grow. Each upgrade unlocks more precision, ease, and satisfaction.
(Some links are affiliate links — they help support the blog at no extra cost. Thanks for your support!)