The 3D printing scene got a serious shake-up in 2022 when newcomers like Bambu Lab and AnkerMake dropped ultra-fast printers out of nowhere. That set off a speed race, and now users are expecting faster machines across the board—without breaking the bank.
Anycubic’s response? The Kobra 2 Neo.

This isn’t just a re-release—it’s a full-on overhaul of their original Kobra. They basically tore the thing apart and rebuilt it with tougher metal parts, better cooling, and a Volcano-style hotend that’s optimized for speed and flow. The result? A printer that hits a default print speed of 150mm/s, and can push up to 250mm/s in draft mode—roughly five times faster than last year’s models, according to Anycubic.
But it’s not just about speed.
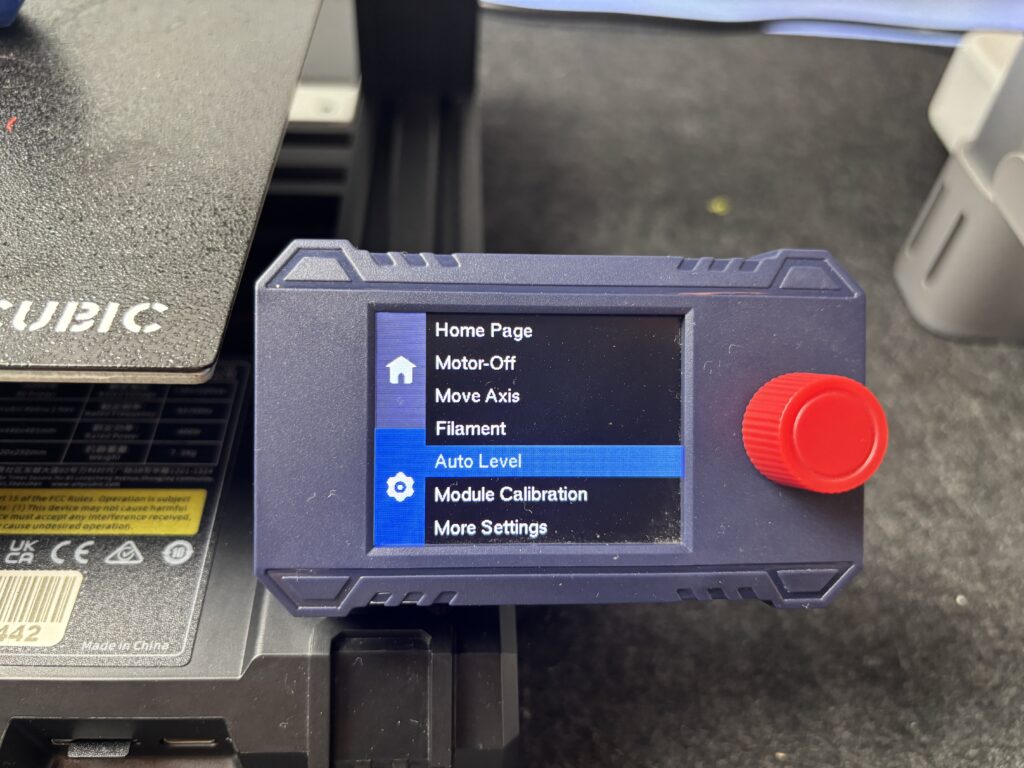
The Kobra 2 Neo also comes with LeviQ 2.0, Anycubic’s fully hands-off auto bed leveling system. It still uses an inductive sensor, but now the nozzle physically taps a switch behind the build plate to determine the correct Z-height. That means no paper tests, no manual knobs—just plug in, hit “Auto Level,” and let it do its thing.
The Anycubic Kobra 2 Neo does in fact support input shaping and linear advance right out of the box—features typically found in high-speed, Klipper-based printers. These are built into its Marlin firmware and help reduce vibrations, ringing, and other artifacts that show up during fast prints.
Even without any mods, though, the Kobra 2 Neo prints very cleanly. At 0.2mm layer height, surface finish is smooth, and the high-RPM 5020 fan keeps overhangs sharp and tidy. For most users, the built-in input shaping will be more than enough to get great prints at speed.

So yeah, while there might be a little ghosting when you’re printing at max speed, the Kobra 2 Neo handles normal fast speeds (120–150mm/s) like a champ. And what’s even more impressive? It can handle PETG and TPU at those speeds—something most budget printers struggle with. That’s likely thanks to the dual gear direct drive, which gives you excellent filament control, especially during retraction.
At just $269, the Kobra 2 Neo punches way above its price range. If you’re someone who thought high-speed printing was reserved for $500+ machines, this thing might just change your mind.
With easy setup, reliable auto-leveling, and speed that genuinely cuts down print times, the Kobra 2 Neo is a solid choice, not just for beginners, but for anyone who wants a no-fuss, high-speed printer without draining their wallet.
Anycubic 2 NEO specifications
- Build Volume: 250 x 220 x 220 mm (H x W x D)
- Print Speed:
- Maximum: 250 mm/s
- Recommended: 150 mm/s
- Acceleration: 2,500 mm/s²
- Extruder: Integrated Direct Drive with a 60W hot end
- Cooling System: 7000 RPM fan for rapid cooling
- Nozzle Diameter: 0.4 mm (standard)
- Layer Thickness: 0.1 – 0.4 mm
- Maximum Nozzle Temperature: 260°C
- Maximum Bed Temperature: 110°C
- Build Platform: PEI Magnetic Spring Steel Plate (220 x 220 mm)
- Leveling System: LeviQ 2.0 Automatic 25-point leveling with smart Z-offset adjustment
- Firmware Features: Linear Advance and Input Shaping for enhanced print quality
- User Interface: 2.4-inch LCD with knob control
- Connectivity: MicroSD card slot
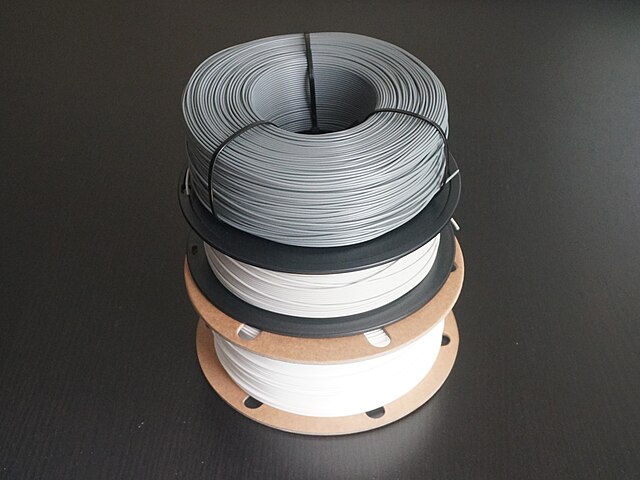
- Supported Materials: PLA, ABS, PETG, TPU (1.75 mm filament)
- Slicing Software: AnycubicSlicer; compatible with Cura and PrusaSlicer
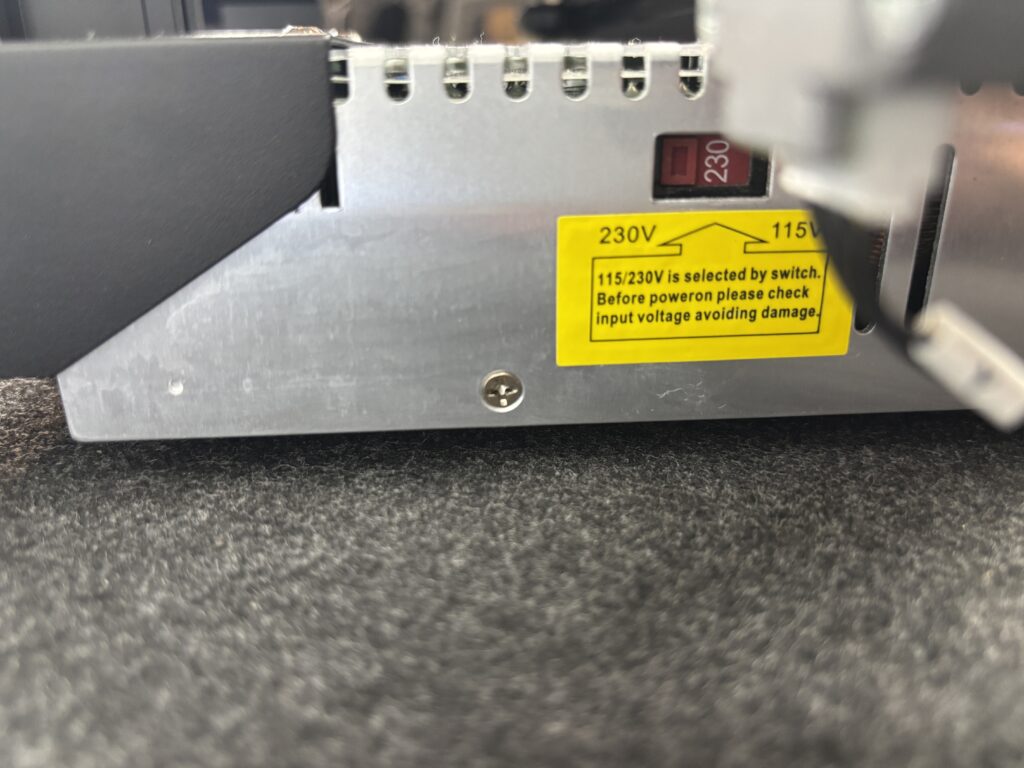
- Power Supply: 400W
- Dimensions: 485 x 440 x 440 mm
Some of the links in this post are affiliate links — which means if you click and buy something, I may earn a small commission at no extra cost to you
Included in the box : Anycubic Kobra 2 NEO
Out of the box, the Anycubic Kobra 2 Neo gives you pretty much everything you need to get started—no extra shopping required.

You’ll find a full set of tools for assembly and maintenance, a microSD card with a USB adapter, a spare nozzle, and even a small roll of sample PLA filament to run your first print.
There’s also a printed quick start guide to walk you through the setup step-by-step. And on the SD card, you’ll get some pre-sliced models, a PDF version of the user manual, and even installers for both Cura and PrusaSlicer—so you’re ready to go whether you’re a beginner or more advanced.
💡 Pro tip: You can create a custom profile for Kobra 2 Neo in Cura or PrusaSlicer by using the recommended 150mm/s base speed and tuning outer walls to 30–40mm/s for better finish.
Assembling the Anycubic Kobra 2 NEO
It took me about 20 minutes to set up the Kobra 2 Neo—and I wasn’t even rushing.
Out of the box, the printer comes in two main chunks: the base and the gantry. You just line them up (the notches on the base make that super obvious), screw in a few bolts, and it’s locked in.
I’ve made the full assembly process here :
The toolhead ships separately. Four more screws and it’s on. Plug in a few clearly labeled cables—no hunting, no guessing. Everything fits exactly where it should.
Honestly, it’s one of those setups where you don’t need to second-guess yourself. Even if you’ve never touched a 3D printer before, this feels straightforward. No nonsense, no chaos—just tighten, plug, and go.
Leveling the Anycubic Kobra 2
The Kobra 2 Neo features an updated version of Anycubic’s inductive auto-leveling system, known as LeviQ 2.0. It still relies on a non-contact magnetic sensor that hovers just a few millimeters above the metal bed surface to detect its position.
To start the leveling process, you simply navigate to Home → Auto-Leveling, and the printer takes over. It automatically heats up both the bed and nozzle, taps the bed a few times to gather data, then moves to the back of the printer to clean the nozzle using a white silicone pad.
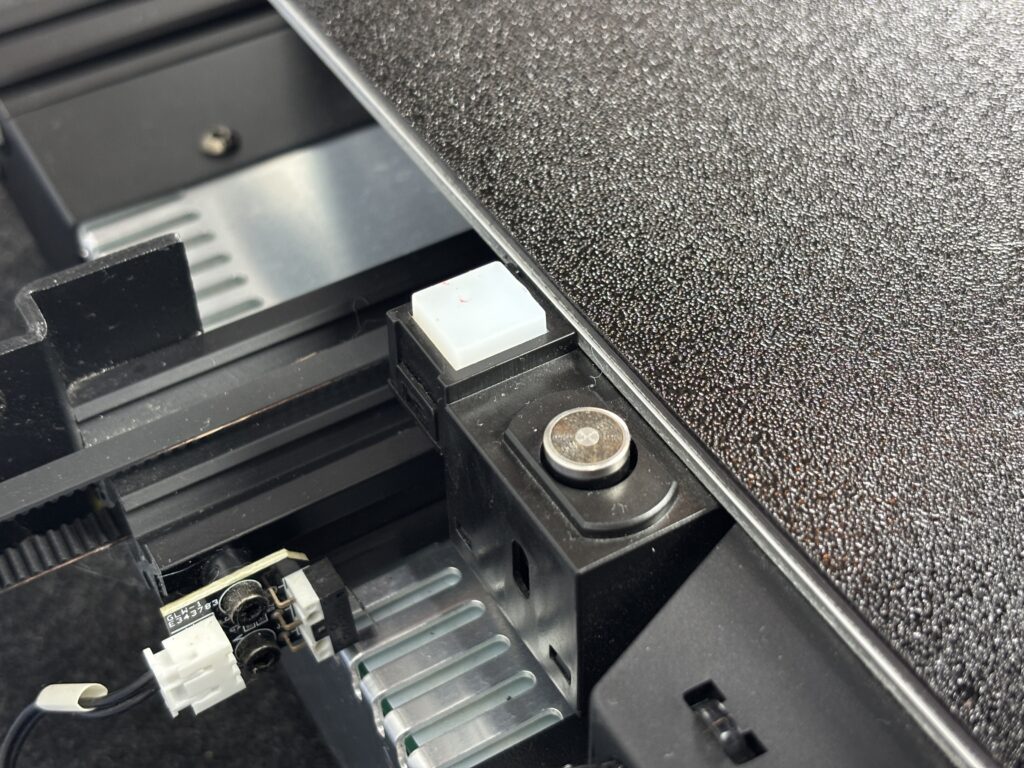
Right after that, it presses the nozzle against a small switch located behind the bed—this switch sits at the exact same height as the build surface. By triggering that switch, the printer accurately determines the correct Z-height for your first layer.
This system eliminates the need for complex sensors on the bed or print head and does a solid job of setting you up for a successful first layer.
After calculating the Z height, the printer moves back to the build plate and scans 25 points in a grid pattern across the surface. The inductive sensor hovers slightly above the bed during this process—the nozzle never touches it, which helps prevent wear or accidental scratches.
Once the probing is complete, the leveling data is saved directly to the printer’s memory. It won’t automatically re-level before every print, so you’ll need to manually run the leveling routine if you move the printer, swap the nozzle, or make any hardware changes.
That said, since the bed is solidly mounted, it tends to stay level over time without needing constant adjustment.
The Anycubic Kobra 2 Neo uses a direct drive extruder setup, paired with a reverse Bowden tube and a filament runout sensor located near the side-mounted spool holder. Everything—gears, cooling fans, and the hotend—is packed neatly into a single front-mounted print head.

To load filament, go to the Prepare menu, then select Filament, and choose either Filament In or Filament Remove. The printer will automatically preheat the hotend to 230°C.

Place your filament spool onto the holder, then guide the filament through the short white PTFE tube, and toward the extruder. Press Filament In, pull back on the lever next to the tube, and push the filament forward until the gears catch it. Once you see filament starting to extrude below the nozzle, press Stop.
Unloading filament is basically the same in reverse: preheat the hotend, select Filament Remove, let the extruder back the filament out, and pull it out manually once there’s no resistance left.
At first glance, the Anycubic Kobra 2 Neo sticks with the sleek black-and-blue color scheme seen across the Kobra lineup. But take a closer look and you’ll notice some meaningful upgrades under the hood.
One standout feature is the redesigned hotend shroud, which now includes an opening to house a powerful 5020 radial blower fan. Shaped like a mini hamster wheel, this fan spins at up to 6500 RPM, delivering targeted cooling to keep overhangs crisp and layers smooth during high-speed prints.
All electronics—including the 400W power supply—are neatly tucked away beneath the build plate. This undercarriage design keeps the frame clean and compact, making it ideal for tight workspaces.
Perhaps the most interesting mechanical upgrade lies in the motion system. Anycubic has implemented a hybrid solution using V-slot aluminum extrusions combined with metal SG15 bearings. These U-groove bearings glide along embedded steel rods that run through the frame’s channels, reducing friction and providing smoother, more precise movement compared to basic plastic rollers.

Most budget 3D printers rely on V-slot wheels, which use rubbery rollers that run inside aluminum channels. While this design is affordable and quiet, the wheels tend to wear down over time and can introduce wobble. In contrast, linear rods—often found in higher-end machines—offer smoother motion and longer-lasting durability.
The Anycubic Kobra 2 Neo combines the best of both worlds with a hybrid setup: metal SG15 U-groove bearings ride along steel rods embedded in the V-slot frame. According to Anycubic, this setup helps reduce friction, boosts print accuracy, and holds up better over time compared to traditional wheels.
Another mechanical upgrade is the dual Z-axis screw system. The X-axis gantry is supported by lead screws on both sides: one is motor-driven, while the other is kept in sync using a timing belt. This ensures both sides lift evenly, improving stability—especially during taller prints and fast Z-axis movements.
Cooling also gets a serious boost. The Kobra 2 Neo features a central 5020 radial blower fan spinning up to 7000 RPM, pushing a strong airflow through dual ducts aimed precisely at the nozzle. This helps solidify extruded filament quickly, which is crucial for clean overhangs and sharp details when printing fast.
For extrusion, Anycubic includes a direct drive extruder with dual gears, offering better grip and smoother feeding—even with flexible filaments like TPU. The extruder feeds directly into a Volcano-style hotend, which is optimized for high-speed, high-volume extrusion.
The hotend uses a 60W heater block, capable of maintaining temperature stability even at speeds up to 250mm/s. Better yet, Anycubic built this hotend using E3D’s open-source standard, meaning you’re free to use third-party nozzles instead of being locked into proprietary parts.
The Anycubic Kobra 2 Neo comes equipped with a flexible spring steel build plate, coated in a textured PEI (Polyetherimide) surface. It’s held in place by a strong magnetic base, making print removal fast and frustration-free. For most filaments, prints pop off automatically once the bed cools. And when they don’t—especially with larger models or sticky materials like PETG—you can simply flex the plate slightly to release them without reaching for a scraper.

The heated bed can reach up to 110°C, which is more than enough for materials like PLA, PETG, and TPU. Meanwhile, the hotend is lined with PTFE tubing, giving it a safe max temperature of around 260°C. That’s suitable for most consumer filaments, though it’s not ideal for high-temp materials like nylon or polycarbonate.
Bottom line
The rise of high-speed 3D printers has seriously raised the bar—even entry-level machines are expected to go fast now. And the Anycubic Kobra 2 Neo does a surprisingly good job of keeping up. It’s priced affordably, comes with a user-friendly interface (even if it’s not a touchscreen), and offers true automatic bed leveling—making it a great option for beginners who just want to start printing without tweaking a hundred settings.
Of course, it’s not flawless. Like most budget printers, the Kobra 2 Neo doesn’t include Input Shaping, a firmware feature that helps reduce ringing and ghosting during fast prints. So if you often print at higher speeds or deal with sharp corners, you may notice some mild vibration artifacts in your prints.
That said, the print quality holds up surprisingly well in practice. In real-world testing, it handled small to mid-sized prints with ease—even at speeds around 150mm/s, which is the factory default. Layer lines were fine and clean at 0.2mm, and surface quality was crisp enough for most use cases.
If you’re comparing it to other popular budget printers, here’s the quick breakdown:
- Elegoo Neptune 3 Pro – Sleek touchscreen, quieter stepper drivers, and clean cable management. If you care about polish, it’s a solid pick.👉 Check Neptune 3 Pro on Amazon
- Creality Ender 3 V3 SE – Decent build, CR Touch leveling, fast on paper, but hit-or-miss on build quality. 👉 See Ender 3 V3 SE here
- Anycubic Kobra Go – Want something even cheaper? The Go strips out some features but keeps the core essentials like auto bed leveling. 👉 Explore Kobra Go here
And yeah, if you’re going all-in on speed and future upgrades…
- Bambu Lab P1P – CoreXY architecture, multicolor support, and ridiculous speed. It’s in a different league, but totally worth it if you’ve got the budget. 👉 View Bambu P1P
For under $300, the Kobra 2 Neo hits a sweet spot between speed, reliability, and ease of use. Whether you’re new to 3D printing or just want a solid second machine that doesn’t break the bank, it’s one of the most well-rounded options out there.